Jetfighter III Checklists
| Daily Duties Checklist | |
|---|---|
| Duty | Location |
| Read your email to get latest intel | Cabin |
| Read the newspaper | Library |
| Attend Mission Briefing | Briefing Room |
| Select aircraft | Hangar |
| Load ordnance | Hangar |
| Go to aircraft | Hangar |
| Take-off Checklist | |
| Pre-flight | |
| Adjust the speaker or headphones volume to a comfortable level. | |
| ADJUST RUDDER PEDALS | |
| Make sure the control stick moves freely and is secure. | |
 Takeoff | |
| Check control surfaces are moving freely and correctly | |
| Take care not to trigger weapons release | |
| Engine Start | |
| Brake ON | B |
| Thrust 60 % | 6 |
| Standard takeoff | |
| Flaps Down | Ctrl F |
| Engines to Burner | |
| WheelBrake off | B |
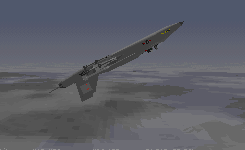
| Rotate AT 130 kts BY PULLING THE STICK BACK | |
| The amount of back stick necesary will depend on the ordnance loadout. | |
| Maintain precisely 10 deg pitch up. | |
CAUTIONWARNING Do not over-rotate the aircraft at take-off, as this will cause stalling. Be prepared to rapidly adjust the stick forward as the aircraft takes off | |
| Gear up | G |
| Flaps up | Ctrl F |
| Navigation | |
| Autopilot | |
| The autopilot steers the a/c towards the currently selected waypoint. | |
| Auropilot on | Shift A |
| Autopilot off | Shift A |
| WARNING: The autopilot will not avoid terrain or land the aircraft. | |
| Navigate to Waypoint | |
| HUD to Nav mode | N |
| View waypoints | F7 |
| Next waypoint | N |
| Previous waypoint | Shift N |
| Look forward | F1 |
| Follow the steering bugs to the waypoint | |
| Note: The waypoints also appear as green dots on the map (M) | |
| HASELL scan | |
| Run this scan constantly during flight: | |
| Heading | On the HUD |
| Altitude | On the HUD |
| Speed | On the HUD |
| Engines | On the HUD |
| Lookout | F2 - F4 - F3 - F4 |
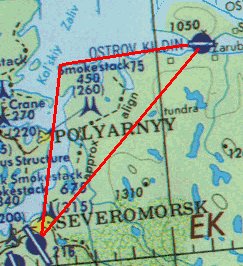 Map of the North cape area | |
| Station Keeping | |
| The first few flight exercises relate to Station Keeping. | |
| Station Keeping is the ability to keep your aircraft on a specified HEADING, ALTITUDE and SPEED. | |
| Aircraft fly at set altitudes which are decided before flight. Develop the habit of maintaining your desired altitude within plus or minus 100 feet. | |
| Fly at "round number' altitudes, such as 500 ft, 1000 ft, 1500 ft, 2000 ft, 5000 ft, 10000 ft etc. | |
| Flight Exercise: Maintain Level Flight | |
| Pause the simulation | Ctrl P |
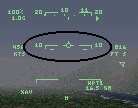
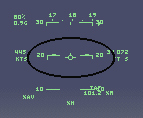
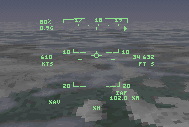
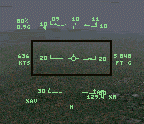
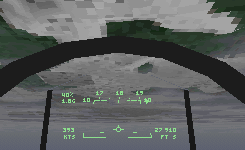
| Find the FPI (Flight Path Indicator) | |
| Find the Pitch ladder | |
| Adjust the Pitch ladder | L |
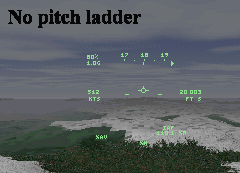 HUD with pitch ladder turned off | |
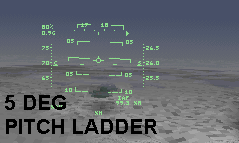 HUD with a 5 degree pitch ladder | |
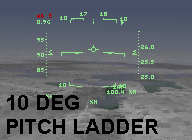 HUD with a 10 degree pitch ladder | |
| Fast Jet Throttle Settings | |
| Throttle Settings | |
| Flight exercise: Cruise Throttle Setting | |
| When you can comfortably maintain level flight, set the throttle to 80 %. | |
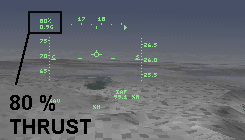 80 & thrust | |
| 80 % thrust | |
| Flight exercise: MIL POWER | |
| 100 % throttle is known as MIL POWER ( Full military power) | |
| Select MIL POWER | 0 |
| Flight exercise: Gate Settings | |
| Selecting Afterburner is referred as "going gate". The aircraft in JetFighter 3 have 5 afterburner stages. | |
| Select A/B stages 1 - 5 | |
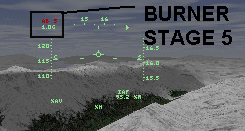 Stage 5 afterburner | |
| Stage 5 afterburner | |
| Set MIL power | 0 |
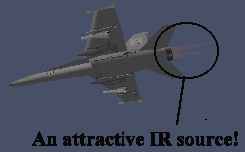 The afterburner puts out a LOT of heat.. don't use it when there are enemy fighters about! | |
| Climb and Descent | |
| Cultivate smooth and accurate climbing. The 10 degree climb is common practice in a fast jet. | |
| 10 DEGREE CLIMB | |
| Establish the aircraft in level flight | |
| Set cruise throttle setting | |
| Ease back on the stick until the FPI has settled on the 10 degree pitch ladder. | |
| 10 degree climb | |
 Note the altitude increasing | |
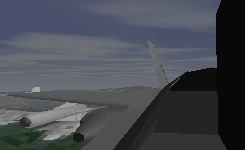
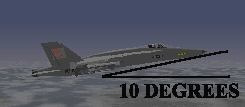 F/A-18 Hornet in a 10 degree climb | |
| Ease the stick forward until level flight is established at a 'round number' altitude | |
| Establish another 10 degree climb | |
| Establish level flight | |
| 20 degree climb | |
 20 degree climb | |
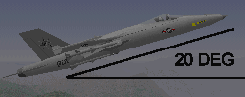 F/A-18 Hornet in a 20 degree climb | |
| Descend at 10 Degrees | |
 10 degree descent | |
| Descend at 20 Degrees | |
 20 degree descent | |
| Basic Flying Skills: Level Turns | |
| There are 3 important principles to remember before you turn: | |
| 1. Look before you turn | |
| 2. Look before you turn | |
| 3. Look before you turn | |
| Level Turns | |
| Establish level flight | Adjust the stick |
| Set cruise speed | 0 |
| Look left | F2 |
 Looking Left | |
| Look back left | F4 |
 Looking back left | |
| Look right | F3 |
 Look Right | |
| Look back right | F4 |
 Look back Right | |
| Now that we are sure there is no conflicting air traffic in the immediate area, we can begin our turn. | |
| Look slightly left | Keypad 7 |
| Ease the joystick left until you are in a 45 degree bank | |
| Release the joystick | |
| The aircraft will turn left. | |
| You are now in a level turn to the left. | |
 Looking slightly left in a level turn | |
| As you approach the desired heading, ease the joystick right until the aircraft is again in level flight. | |
| Ease the joystick right until a 45 degree bank is achieved The aircraft will turn right. Ease the joystick left until the aircraft is level again | |
| Stall Recovery | |
| Climb to 20,000 feet and practice stall recovery. | |
| Cut the throttle to 10% (1 key) | 1 |
| Establish a 40 degree climb | |
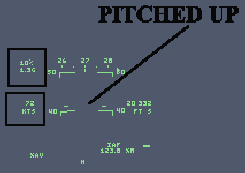 Pitched up, prior to a stall | |
| Pitched up, prior to a stall. Note the airspeed has dropped to 72 knots | |
| A stall will develop | |
| STALL RECOVERY CHECKLIST | |
| Stall warning horn will sound | |
| Stick FORWARD | |
| Throttle 100 % | |
| Pitch DOWN 20 DEGREES | |
| Resume level flight as speed increases | |
| Basic Flying Skills Part 5: The Loop | |
| Definition: A complete circle flown in the pitching plane. | |
| The loop can be used as a defensive or an offensive manoeuver. Refer to the chapter in your JF3 manual on ACM. | |
| Vertical Loop | |
| Perform Hasell Checks | |
| Establish A Set Heading And Altitude | |
| Thrust to Full Burner | |
| Look Up | |
| Pitch Up At A Constant 3 G's | |
 Pulling up into the loop | |
| Be gentle on the stick. Speed is easily dissipated in the loop by harsh use of elevators | |
| AS THE A/C GOES "OVER THE TOP" Thrust 50 % | |
 Going over the top in an F/A-18 | |
| Pitch MAINTAIN 3 G's | |
 Inverted and starting down | |
| Level out at your original Heading, Altitude And Speed | |
 Inverted and looking back... Whoooaaah! | |
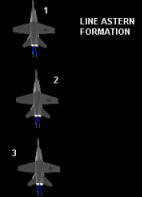
| Formation Flight | |
| Look at your wingman | W |
| If the wingman is not in visual range: | |
| Radar On | Alt R |
| IFF Discriminator ALL | ; |
| TARGET WINGMAN | T |
| TACTICAL VIEW | F9 |
| MANOEUVER TO FORMATION POSITION | |
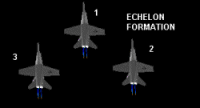 Echelon formation | |
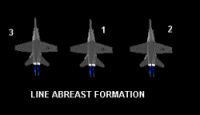 Line Abreast formation | |
 Adjust thrust and stick to maintain station | |
| Air to Air checklist | |
| Display the Radar | Alt R |
| AIR TO AIR MODE | Enter |
| Radar Range DOWN | R |
| Radar Range UP | Shift R |
| IFF TOGGLE: All | Hostile | Friendly | ; |
| Designate Target | |
| CLOSEST | Y |
| AHEAD | U |
| CYCLE ALL | T |
| Target Range 6 - 20 km | |
| Select AMRAAM | |
| Steer TARGET DESIGNATOR BOX INTO TARGETING CIRCLE | |
| Fire WHEN TD BOX FLASHES | |
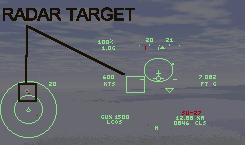 Locking up a radar target | |
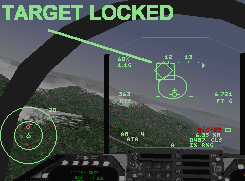 Target locked | |
| Target Range 2 - 10 km | |
| Select AIM-9 | |
| Steer TARGET DESIGNATOR BOX INTO TARGETING CIRCLE | |
| Fire WHEN TD BOX FLASHES | |
 Firing an AIM-9 Sidewinder missile | |
| Target Range 0 - 2 km | |
| Select GUNS | |
| Air to Air: GUNS SNAPSHOT | |
| Defn: A gun attack achieved by crossing the bogey's flight path (often at high angles). | |
| Pros: Quick to execute. | |
| Pros: You can keep your energy state high. | |
| Cons: Target has a less predictable flight path. | |
| Cons: More difficult to execute as you may only have a fraction of a second to get the kill. | |
| Air to Air: Guns Snapshot | |
| Mentally project the enemy flight path | |
| Position the pipper well in front of this path | |
| Correct as necessary to intersect the enemy flight path | |
| Fire as bogey comes into range | |
CAUTIONWARNING It is exceedingly dangerous to lose sight of the enemy below the nose of your a/c. If this looks like occurring, maneouvre to keep the bogey to one side rather than below your a/c. | |
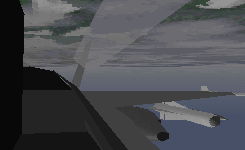
 Approaching an unsuspecting air target | |
| Air to Air: GUNS TRACKING SHOT | |
| Defn: A gun attack achieved by maneuvering to the rear quarter of a bogey. | |
| Advantages: More certain kill once a tracking solution is achieved. | |
| Disadvantages: Longer time required More predictable flight path. This is very dangerous in a multi-bogey environment. | |
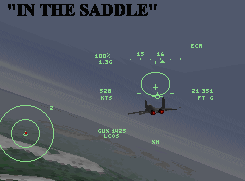
| Manoeuvre to the bogey's rear quarter | |
| Point your nose ahead of the target | |
| Match the bogey's bank | |
| Match the bogey's turn rate by keeping the bogey at a constant position in your HUD | |
| At this stage you are "In the saddle" | |
 Lining up for a tracking shot | |
| Pull up until the pipper is over the target | |
| Fire short bursts | |
 Manoeuvering behind the MiG-29 | |
| Air to Ground | |
| MISSION PROFILES | |
| The standard ground attack profile is known as a : HI - LOW - HI i.e. a High level ingress, a low level approach to target and a high level return to base. | |
| LOW LEVEL FLIGHT | |
| Set Pitch Ladder to 5 degrees | L |
| Set Altimeter to ABOVE GROUND LEVEL | Shift A |
| Fly BELOW 500 FEET | |
CAUTIONWarning: Do not exceed 5 degrees pitch down when manoeuvering at low altitude | |
| AGM-65 MAVERICK | |
| Radar DISPLAYED | Alt R |
| AGM-65 SELECT | Backspace |
| Select pre-programmed targets | |
| Wpn release when 'IN RNG' is displayed | |
| Egress | |
| A/C IS FREE TO MANOUEVER AFTER WEAPON RELEASE | |
| JINK | |
| FLARES | F |
| CHAFF | C |
| CCIP BOMBING | |
| Select MK82 | Backspace |
| Altimeter to ABOVE GROUND LEVEL | Alt A |
| Head TOWARDS TARGETS | |
| Altitude 1,500 ft | |
| RELEASE BOMBS AS PIPPER PASSES OVER TARGET | |
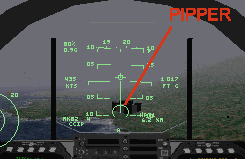 Pipper on the target | |
| JINK | |
| FLARES | F |
| CHAFF | C |
| TARGETS OF OPPORTUNITY: AGM-65 Maverick | |
| Radar DISPLAYED | Alt R |
| AGM-65 SELECT | Backspace |
| Enable Targeting system | Shift D |
| MANOEUVER TDC OVER TARGET | |
| DESIGNATE TARGET | D |
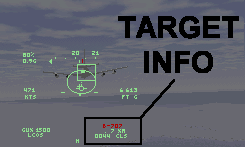
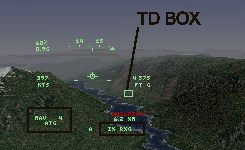 The Target Designation box is handy when the target is beyond visual range | |
| Release weapon when TDC flashes | |
| JINK | |
| FLARES | F |
| CHAFF | C |
| NOTE: The target designator can be very useful for marking target locations. For example, on a low level sweep in bad weather and rugged terrain, marking a location as you fly past makes it easy to find your way back using the HUD range readout and the tactical view (F9). | |
| Landing ILS | |
| HUD NAV MODE | N |
| SELECT IAF (Initial Approach fix) | N |
| Alt | 3000 FT |
| Speed | 300 KTS |
| SELECT FAF (Final Approach fix) | N |
| FOLLOW GLIDE SLOPE | |
| Speed | 250 kts |
| Gear DOWN | G |
| Flaps DOWN | F |
| SELECT RUNWAY WAYPOINT | N |
| PUT VELOCITY VECTOR ON LANDING AREA | |
| AOA | 7-8 DEG |
| Visual Landing | |
| Approach the runway from any heading | |
| HUD NAV MODE | N |
| Altimeter AGL MODE | Shift-A |
| Alt | 600ft AGL |
| Speed | 300 KTS |
| DOWNWIND | |
| Position 1 mile ABEAM OF RUNWAY | |
| Alt | 600 ft AGL |
| Speed | 250 KTS |
| Gear DOWN | G |
| Flaps DOWN | Ctrl-F |
| ARC TO FINAL | |
| Position 1-3 MILES PAST THRESHOLD | |
| Throttle | 60% |
| BANK LEFT AT 3g | |
| INTERCEPT ILS | |
| AOA | 7-8 DEG |
| Place FPI ON RUNWAY | |
| TOUCHDOWN | |
| Throttle 10% | |
| Stick FORWARD | |
| Brake ON | B |
| Taxi AT 30 KTS | |
| Carrier Take-off | |
| CARRIER PRE-FLIGHT | |
| TOWER "Ready to Launch" | |
| Adjust the volume of your speakers or headphones | |
| Make sure the control stick moves freely and is secure. | |
| WARNING: Take care not to trigger weapons release. | |
| CARRIER ENGINE START | |
| Engines 60% RPM | 6 |
| CARRIER NAVIGATION | |
| Note bearing and Altitude to WP 1 | |
| CAT LAUNCH | |
| FULL AFTERBURNER | / |
| Hold Stick 3/4 back | |
| Release wheelbrake | B |
| CARRIER CLIMB OUT | |
| Pitch 20 DEG UP | |
| Altitude INCREASING | |
| Speed INCREASING | |
| Gear UP | G |
| Flaps UP | Ctrl-F |
| Heading TO WAYPOINT 1 | |
| ACM CONFIDENCE CHECKS | |
| Radar DISPLAYED | Alt-R |
| IFF HOSTILE | ; |
| INSTRUMENT APPROACH | |
| SELECT NAV MODE | N |
| SELECT IAF | |
| (Initial Approach Fix) | N |
| Alt | 3000 ft |
| Speed | 300 kts |
| SELECT FAF (Final Approach Fix) | N |
| Speed | 250 kts |
| Gear DOWN | G |
| Flaps DOWN | Ctrl F |
| Hook DOWN | A |
| FOLLOW GLIDESLOPE | |
| SELECT CVN (Carrier) | N |
| PUT FPI ON THE ARRESTOR WIRES | |
| MAINTAIN AOA OF 7 - 8 DEGREES | |
| VISUAL APPROACH | |
| DOWNWIND | |
| Heading Opposite course to carrier and 1 mile abeam | |
| Alt | 600 FT |
| Speed | 250 KTS |
| Gear DOWN | G |
| Flaps DOWN | Ctrl F |
| Hook DOWN | A |
| ARC TO FINAL | |
| Position 1 1/2 TO 3 miles past carrier | |
| BANK LEFT AT 3g TO INTERCEPT ILS | |
CAUTIONNOTE Remember that the landing bearing is 10 deg left of the carrier heading, so travel past the wake during the arc . | |
| Alt | 600 ft |
| Speed | Reducing |
| AOA | 7-8 DEG |
| FINAL | |
| FOLLOW ILS | |
| Check GEAR, FLAPS, HOOK DOWN | |
| AOA | 7-8 DEG |
| WAVE OFF | |
| Throttle FULL BURNER | / |
| Gear UP as you leave the deck | G |
| Flaps UP | F |
| Adjust pitch to avoid impact with the sea | |
| FLAME OUT ON APPROACH | |
| Gear UP | G |
| Flaps UP | F |
| Engine RESTART | 0 |
| Pitch 5 DEGREES UP | |
| Emergency Checklists | |
| MISSILE AVOIDANCE | |
| IR and RADAR GUIDED MISSILES | Radar White dots |
| Map Red arrows | |
| ECM ON | J |
| MANOEUVER ACROSS THE MISSILE PATH | |
| DISPENSE FLARES | F |
| CHAFF | C |
| STALL RECOVERY | |
| STALL WARNING HORN WILL SOUND | |
| Stick FORWARD | |
| Throttle 100 % | |
| Pitch DOWN 20 DEGREES | |
| RESUME LEVEL FLIGHT AS SPEED INCREASES | |
| If a fully developed stall occurs below 5,000 ft | |
| PULL EJECTION HANDLE | Ctrl E |
| EJECTION | |
| EJECTION is mandatory in these circumstances: | |
| 1. Aircraft is in a descending attitude and cannot be leveled out | |
| 2. Stall below 5,000 ft | |
| 3. Spin below 10,000 ft | |
| 4. Engine fire | |
| If time allows: | |
| Head towards the sea or unpopulated areas | |
| SLOW TO < 400 KTS | |
| EJECTION SPEED RANGES | |
| SAFE | 0 - 400 kts |
| UNSAFE | 400 - 600 kts |
| EXTREMELY HAZARDOUS | >600 kts |
| At low level Pitch UP 20 DEGREES | |
| This imparts a higher trajectory to the ejection seat than ejecting from level flight | |
| PULL EJECTION HANDLE | Ctrl E |