MiGMan
2006: Pentium 4 with Silent Running mods
For a while I looked at small form factor PC's such as the "Shuttle" range and the similar pieces from "MSI". The marketing was convincing, as good marketing is, promising "silent running" and compact design. Well there was no doubt about the compact design. But that brought it's own problems - difficulty of assembly, more labour to upgrade - and in fact more limited upgradeability - and increased cost, with these cases running from AUD $300.00 to AUD $500.00.
In the end I managed to get together an almost totally silent PC in a $50.00 bog standard PC tower case - the same case that originally housed my incredibly noisy AMD 2100.
Check out this article at www.denguru.com which pretty much sums up what I believe about these small cases - Lessons learned from building small form factor PC's
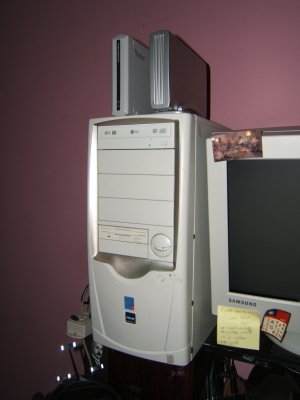
The MiG-Puter looking rather 1960's Robot-sinister with the two external hard drives atop.
The main energy waster (i.e. electrical energy converted to heat) in the PC is the CPU, and the power supply.
There are 3 ways this energy is transmitted:
Conduction.
From the CPU, through the heatsink. Copper is a better conductor of heat than the usual aluminium alloy used in standard CPU heatsinks.
Radiation.
The heat is radiated from the heatsinks to the air which is - hopefully - moving between the fins.
Convection.
Via moving air - helped along by the fans. AIRFLOW is everything. The silent PC now has air flowing in at the bottom of the front face, and flowing up across the motherboard and CPU, out through the case fan (top - back) and the power supply - where more heat is added before expulsion.
The addition of acoustic foam also plugs the leaks - and the useless vents in the side of the case. Since hot air rises - we may as well use the natural convection to assist airflow and bring cold air in at the bottom and evacuate at the top. This is why most PC cases have the power supply at the top. So some thought is given to airflow but since cheap cases leak like a sieve they are not very effective. Luckily this can be fixed cheaply with the acoustic foam.
Lessons I learned from a harrowing Easter holiday upgrade experience were
Be careful about who you let poke around inside the box. Blowing a motherboard is apparently pretty easy.
NEVER leave the shop without seeing with your own MkII Human Eyeballs that the PC is working - by watching it boot up - on a monitor -- -- -- ! I neglected this simple precaution on the Thursday before Easter - I won't say where - and paid the consequences. I had to (A) - Find somebody prepared to work on the holiday weekend and then (B) - fork out more money for a new motherboard. It could have been worse - at least the CPU still worked.
Case - A Standard PC tower with 4 optical drive bays and 3 3.5" HDD bays. As stated above I have concluded that for many reasons the medium to large sized PC towers are the way to go.
The case has been extensively padded with self adhesive acoustic foam at AUD$ 19.99 per box - and I still have plenty left over.
Power Supply - 1 Arctic 400W Silent power supply. Price $ AUD 200.00
Motherboard - ASUS P4 S800-MX SE to replace the GIGABYTE blown by the PC mod shop guy.
CPU Fan - 1 speed controlled CPU with copper heatsink to replace the standard NOISY fan. Price $ AUD 25.00
Case Fans - 1 larger slow RPM fan to replace the 2 previous fans. Price $ AUD 25.00
Case Foam - The foam comes in large self adhesive blocks. The idea is mainly to cut resonance in the case.
RAM - 1024 MEG DDR 400
The 2 x 256 RAM chips I had previously were not much use with the new single 1024 MEG chip as using them would slow the RAM bus down to their speed of 200 MHz. Anyway the memory slots wouldn't accept all 3 chips in any combination.
Hard Drives - 1 x 30 GIG | 2 x 120 GIG. The second 120 GIG was previously in an external unit - I bought a 250 GIG for that.
Optical Drives - SONY DVD Player
Floppy Drives - 1
Well - you never know when you are going to need one, and a large portion of the Flight Sim Museum's physical collection uses floppy disk media so I still need to be able to access it.
External Storage - 2 x 250 GIG USB 2.0 Drives. Coordinating the Flight Sim Museumarchive had become a real pain using rewritable CD ROMs. The collection spanned a box full of disks. Now I could backup the archive painlessly - and quickly - to one device. And with 2 x 250 GIG I could easily make a backup of the backup.
Network - ADSL Router connecting to the Celeron 466 Mk II. Using a network in conjunction with HyperSnap-DX enabled me to dump screen captures to the slower computer and use that computer to edit and publish them without having to quit the sim itself.
Graphics Card/s - ATI Radeon 9600 XT- the fan started expiring after a couple of years. After a couple of hours googling methods of fan lubrication and repair I decided it was junk and upgraded to a GeForce 6600 GTAGP card with 128 MB RAM.
Monitors - 2 x 17" - SAMSUNG and Mitsubishi. At about AUD $ 220.00 each that was equivalent to the cost of just one flat screen LCD - and for flight simming the CRT technology still delivers more contrast, better viewing angles and quicker response.
Operating system - Windows XP Home Edition
Controllers
Thrustmaster H.O.T.A.S. Cougar
Microsoft Game Voice
Logitech Game Pad
Connectland Illuminated Keyboard - which looks nice and very "cockpit-tech" but unfortunately doesn't work!
XYZ Brand USB keypad.
Yes... " X Y Z " brand! I would have gone for ABC or Ardvaark... but, whatever!
Mounted on the left it allows for example, radar and targetting without taking your hand off the joystick in Enemy Engaged: Comanche vs Hokum. Yes, I know the controls can be mapped to the Thrustmaster H.O.T.A.S. Cougaras well! Sometimes you just want to / need to fly with the joystick and use the free hand to hammer keys.
Microsoft Strategic Commander
And all of that housed on a simply constructed aluminium and plywood desktop console.
Thrustmasterrudder pedals.
Track IR
Voice Buddy