PC Dash Repair
How to fix a dead membrane keyboard on Saitek PC-Dash
It looks like Saitek PC-Dash game controllers have had a common mode of failure, apparently due to some detail in the manufacturing process.
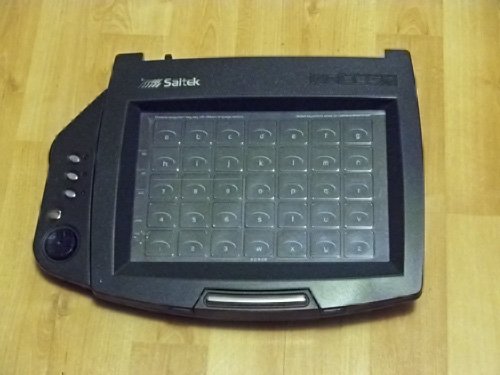
Saitek PC Dash repair(fig.1)
The failure exhibits itself as a complete non-functionality of the membrane keyboard while the tactile keys remain fully functional. Reason for the failure is thorough oxidization of the edges of connector plates in the membrane cable coming from the keyboard to the circuit board.
Opening the PC-Dash is simple enough; all screws holding the case together are readily visible: six on the bottom plate, two in the extreme top corners close to the hinge of the lid. The only "trick" here is that the top lid must be opened before the case opens.

Saitek PC Dash repair(fig.2)
Similarly, the circuit board (fig.2) is easily removed by opening all the screws holding it in place: three around the tactile keys, four clamping the membrane connectors, and yet another one close to the barcode reader. Here attention must be paid to screw lengths and types, as they differ from a place to another.
While it is possible to completely tear off the membrane keyboard to perform the repair, I think it would be worthwhile to try first with the membrane in place. The glue holding the membrane to the case top is rather strong, and I can imagine the membrane shearing from too strong forces (and it's hard to keep the corners of the membrane from bending to dog-ears while removing it).
So, after removing the circuit board, and placing it gently aside (while taking care not to snap the wires coming off the keyboard, and likewise paying attention to the springs in the tactile keys), you should be able to see the connector plates of the two membrane cables (one coming from the barcode reader and another from the keyboard). I frankly didn't pay attention to the condition of the barcode reader connector, but the keyboard connector was faulty: the edges of the connector plates that face the end of the membrane cable were blackened by oxidization (fig.3, left side). This reaction had been strong enough to completely disconnect the connector plates from the cable.
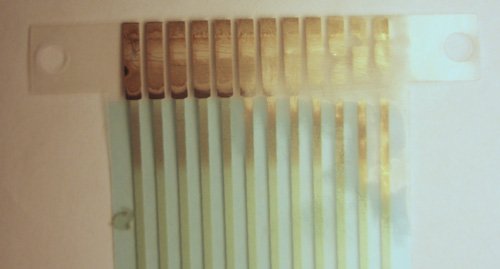
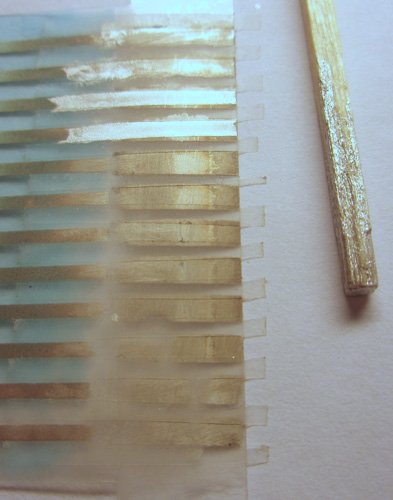
Saitek PC Dash repair(fig. 3)
To correct the problem, I took a piece of "800" sand paper and started to very carefully remove the oxidized part of the connector plates. Very light touch was the key here, as it was rather easy to also completely sand off the connector plates (fig.3, right side). It is also necessary to sand off the top laquer layer from the membrane cable, revealing the metallic connectors from within. After these preparations I made a painting mask from narrow strips of regular office tape. I then proceeded to recreate the missing connections (and connector plates) by painting with "liquid silver" (a conducting "paint" made of varnish and silver flakes), using a matchstick as my paintbrush (fig.4).
Saitek PC Dash repair(fig.4)
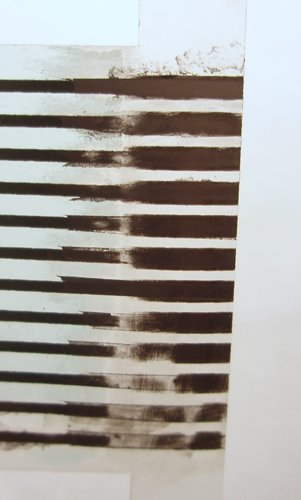
Saitek PC Dash repair(fig.5)
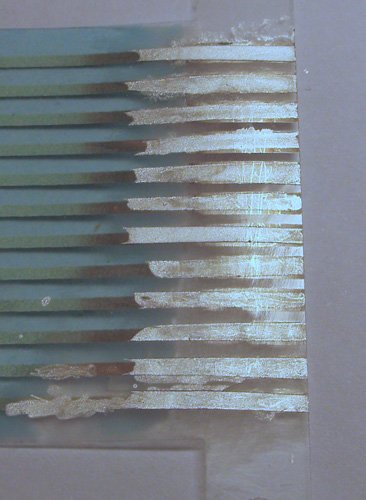
Initially I judged the quality of connections just by the shininess of the newly applied paint layer (fig.5), but a resistance measurement showed that this was not enough -- and shining a light through the cable showed many places where the light shone through the "painted" areas (fig.6).
Saitek PC Dash repair(fig.6)
The low silver content appeared to be caused (partly, at least) by separation of silver from the varnish. This means that the varnsh bottle needs to be shaken at rather short intervals, in order to keep the silver from separating to the bottom of the bottle.

Saitek PC Dash repair(fig.7)
Final measurements after repainting (fig.7) show resistances varying from a couple of ohms to approx thirty ohms, which all seem to be good enough. Evidently the currents used are low enough that these resistances do not have any significant effect.
End results: a working PC-Dash, and happiness from a completed device repair.
❞