X36 Disassembly
First, use the Allan Key to remove the 4 bolts by turning anti-clockwise
Then turn the joystick upside down
Use the Phillips Head screwdriver to remove the 4 screws as shown
Remember to turn the screws anti-clockwise
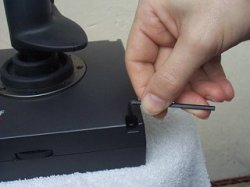
Opening the X36 joystick
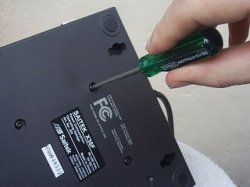
Removing the screws from the Saitek X36 joystick
It's good work practice to keep all the parts (screws, bolts and components) in a container as you remove them. Then when you begin reassembly you will (hopefully) have everything to hand.
Keep the X36 parts tidy during dissasembly
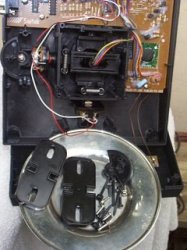
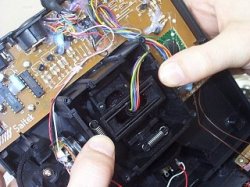
Take a moment to identify the 3 main components you will be dealing with:
- the cradle
- the guides (2)
- and the trim knobs (2)
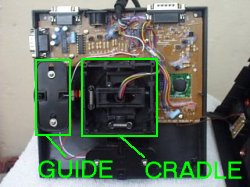
The guide and cradle of the Saitek X36 joystick
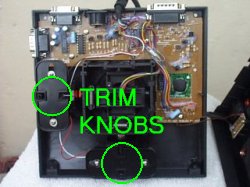
The trim knobs of the Saitek X36 joystick
Remove the 2 guides by unscrewing the guides, remember to turn the screws anticlockwise
Saitek X36 dissasembly
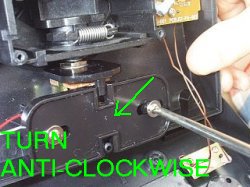
When both screws are undone, carefully remove the guide
Repeat for both guides
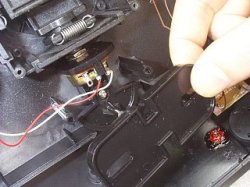
Next, unscrew the TRIM KNOB adjacent to the offending pot and lift it out
Carefully lift the cradle assembly out...
NOT ALL THE WAY
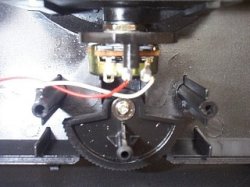
... only lift it out far enough to enable you to remove the pots, removing the cradle of your Saitek X36 joystick
DONT FORCE IT!
If the pot doesn't come out easily, raise the cradle a little more and try again.
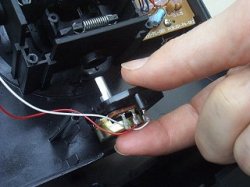
Removing the pots from your Saitek X36
Now that you have the offending pot out of the cradle, warm up your soldering iron and read how to solder in the new pot
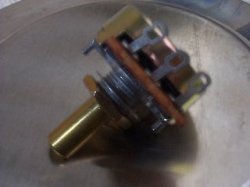
Soldering a new pot and Reassembly.
❝
Solder on a suitable surface such as a saucer
Use a narrow tipped soldering iron if available
Allow the iron a couple minutes to come up to full heat before you start soldering
Make sure the tip is reasonably clean of impurities - wiping it on a damp sponge helps in tha regard
Flow a small amount of solder onto the tip so as to coat it very slightly (this is called "tinning" the tip)
The surface that you solder should also be reasonably clean of impurities and obstructions (bearing in mind that there's less you can do on its unmelted solder)
The wire should be trimmed exposing at least another 1/8" of bare copper or so.
Press the wire into the spot where it needs to be attached making sure that it doesn't short against any of the contacts around it - try to "hook" it into place if at all possible.
Press the soldering iron lightly but firmly to the wire and the connection under it for a couple of seconds - long enough to allow the old solder to flow
Then melt a SMALL AMOUNT of new solder onto that spot (i.e.- on the wire, NOT on the tip of the soldering iron
Give the new solder a couple seconds to flow into the wire and onto the connection
Then hold the wire VERY STILL while the solder cools so as to avoid a "cold" (poorly-conducting) joint
These soldering tips were kindly provided by Nathan Engle | http://php.indiana.edu/~nengle - Electron Juggler's Guild, Local#1 - Indiana University Dept of Psychology | 2009 update - web page is gone.
❝

X-36 Reassembly.
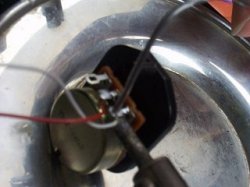
Get the cables in the groove!
Easy, just do all the "disassembly" steps in reverse!
Be careful replacing the main cable, it has a flat side and round side where it passes through the body of the X36.
Plug it all back in, load up your favourite flight sim and have fun!