The Close Combat Series
MiGMan's Combat Diary

Close Combat set a new standard in Real Time Strategy games.
It was based on the long running Squad Leader series of table-top simulations, and not only did it model weapons and terrain - but also the psychology of each individual soldier.
This was revolutionary because it meant that those little guys would no longer necessarily obey your every mouse click. The little soldiers react to events around them and interpret your orders according to their fatigue and morale. To players like myself who whetted their Real Time Strategy (RTS) teeth on Command and Conquer and Dark Reign, this added great subtlety to the gaming experience, or should I say it required much more subtlety in command to get results.
On the plus side, and this is pure joy.... the little fellows make intelligent use of any available cover, using trees, undergrowth, walls, buildings, trenches... any available cover. They'll also go to ground when under fire... crawling if necessary to limit their exposure to fire. Now this was a definite bonus!
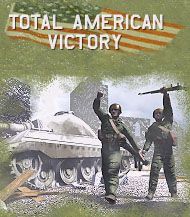
The Campaign in Close Combat runs between June 6 and July 18th, 1944. Your job is to advance your squads off the Normandy beaches and 20 miles inland to St. Lo.
If you play from the German perspective then your job is to harrass and delay the Allied advance.
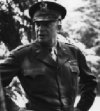
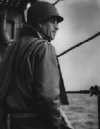
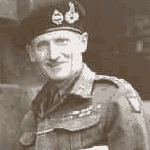
Gen. Dwight D. Eisenhower

The Normandy Campaign was the result of more than two and a half years of planning by the best brains available to the Allied Forces.... and now they've put you in charge !!???
Figure that out!!
Such are the fortunes of war.
The actual invasion was delayed by a month, then almost delayed one last time by bad weather until the the decision to go was given on June 6th, largely because the tides would not be favourable again for another month.

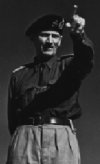
" The war will be won or lost on the beaches.We'll have only one chance to stop the enemy and that's while he is in the water. "Field Marshall Erwin Rommel"
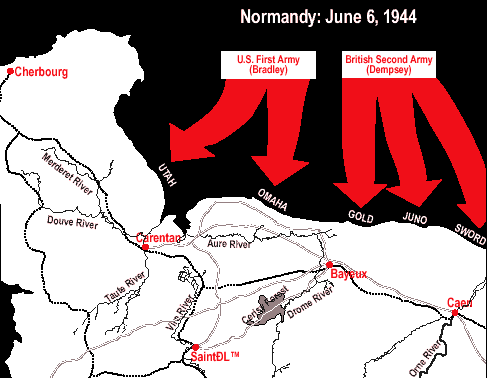
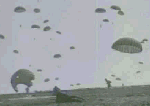
Operation Overlord, the Allied plan for June 6th, 1944
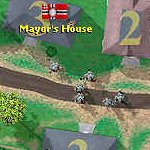
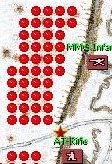
Straight away you can see this country is a sniper's paradise. There is ample cover for the Germans and little room to manoeuver for the US troops. The French vcalled this landscape of hedges and narrow roads "bocage".
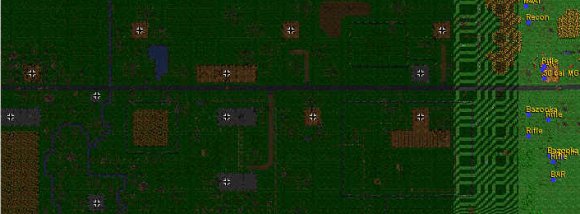
This map shows the starting situation from the US view. You can place your troops anywhere in the light green area prior to commencing the battle.
Close Combat 1 was originally released in 256 colours and the game warned that I might need to adjust my desktop settings to play it. The good news was that it looked great and no tweaking was necessary.
By comparing screenshots here with those in Close Combat 2: A Bridge Too Far and Close Combat 3: The Russian Front you can see how Atomic have developed the graphics, with richer palettes and better textures... but hey! it still does the job and besides... remember what Command and Conquer looked like in DOS?
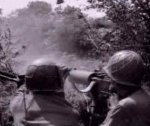
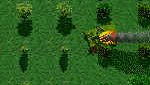
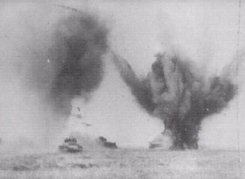
Infantry and tanks advancing under smoke.
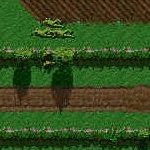
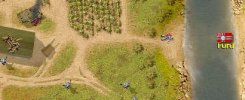
Crawling to cover.

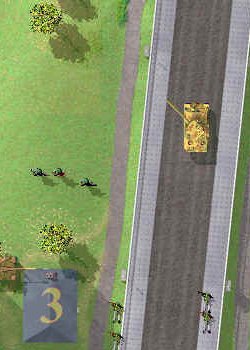
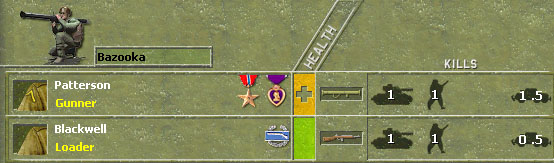
I managed to get a shot at the thinner side armour of this German tank.
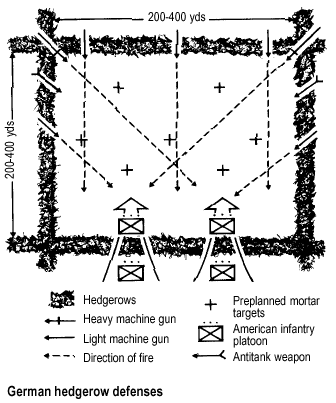
Bocage is the name given to the Norman hedgreow country, planted by Celtic farmers 1,000 years earlier. These irregularly shaped fields, only about 200 by 400 metres, covered a thousand square miles and created ideal defensive terrain.
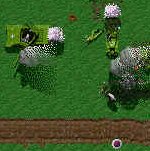
Try infiltration and flanking tactics rather than frontal assault... the "captured" German defensive plan below should give you a few hints.
General Omar Bradley characterised the hedgerow battle as "... a slugger's match, too slow a process."
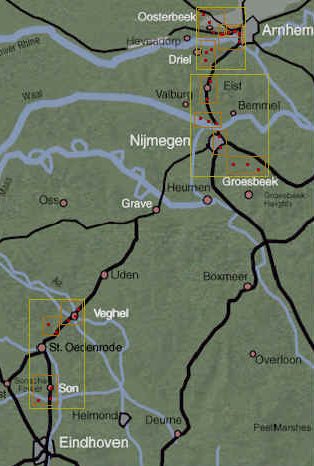
Close Combat 2: A Bridge Too Far starts on December 17th, 1944 and takes you through Operation Market Garden.
Close Combat 2: A Bridge Too Far starts on December 17th, 1944 and takes you through Operation Market Garden.
A sight to chill the bones of an Allied commander
Hardware requirements
Pentium 90 (Pentium 133 recommended)
16 meg of RAM
45 MEG Hard drive Space
4 x CD ROM
Video Card that supports 800 x 600 and 16 bit colour.

Close Combat 3
Close Combat 3 was the most enjoyable and challenging real time strategy game I'd ever played at that time.
Close Combat 2 is a refreshing change from battling the mindless and often S T U P I D minions we've had to deal with in previous RTS games!.... and that's only your own side I'm talking about!
There's also none of that annoying resource management... harvesting ore, grain or whatwever.... and no building. It's combat all the way.
Sometimes you do have to manage the expenditure of ammo, which once again I find adds to the immersion factor. I remember an ex-service friend watching me play one of those other RTS games. After half an hour or so he asked... "When do you run out of ammo?" When I replied that you didn't, he promptly lost interest!
Close Combat 3 works very smoothly in modem play, and you can progress through entire campaigns, with your performance in each battle affecting your start positions and resource points at the start of the next battle.
I personally feel life is complicated enough without having to memorise a whole new set of fictitious weapons every time you get a new game. These fictional weapons are modelled on real world weapons anyway (beam and projectile weapons) so why not stick close to reality? It also means that you can get your hands on an endless supply of supporting material including books and videos.
As you would expect I tried commanding the Soviet side first. In the campaign they are on the back foot to start with, reflecting historical events as the German Wermacht pushed to within 25 miles of Moscow.

In the Command and Control Phase you make decisions about:
Your tactical goal for the upcoming battle
The composition of your force
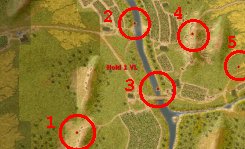
Let's evaluate the Victory Locations (VL) first:
Easily defended West, difficult North and falling Back to 3 would be very exposed
Low ground, little cover. A good chokepoint but you wouldn't want to defend there
The bridge is an excellent chokepoint. You could defend from the houses to the East then fall back under covering fire from the trenches at 4
Good trench systems, a well prepared defensive position with good fields of fire
No cover, this Victory Location is best covered from the hills at 4. If the Germans advance this far you've lost control of the map
Soviet campaign Map 1
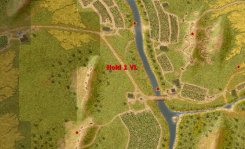
In Soviet mission 1 the briefing requires you to hold 1 victory location (VL) to win. The VL's are indicated by red stars on the briefing map.
Soviet campaign Map 1: Victory locations
Having evaluated the VL's then decide what type of defense you will mount.
Will you attack first? For this you willl need mobile trops and fire support.
Will you lay in ambush? For this you will need weapons with a high rate of fire and good defensive positions.
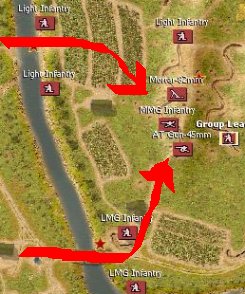
This is how I decided to deploy my troops first time out.
This is only one possible solution out of many!
I'm going to wait until the Germans approach the ford (North) and the bridge (South) and then let rip! When the enemy is pinned down the light infantry can withdraw to the trenches and act as a mobile reserve. That's the plan anyway!
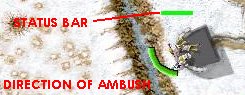
Check Line of Sight by pressing Alt then clicking on the unit.
However no plan survives contact with the enemy !
Basic Employment of Armour
Protection: Use infantry for support and to seek out and destroy anti-tank weapons. Also provide fire support (mortars).
Mutual Support: Position tanks for mutual fire support at all times. Use the Bounding Overwatch principle for movement...
Tank A moves to the next objective under cover from Tank B. Then Tank B moves under cover of Tank A.
Speed: When in open country move the tanks at best speed to the next cover. When moving though close terrain they should advance with the infantry support,
Cover: Having reached the next objective, the tank should halt on a reverse slope, hull down and or under cover.
Artillery or mortar rounds can at least cause a tank to "button up", reducing the crew's ability to see your troops.
Troops in Contact
Infantry
Seize and hold the objective.
Engage and destroy any anti-tank weapons.
Check for minefields and other anti-tank obstacles.
The AT gun has proved it
This Anti Tank gun has proved it's worth, but it can't stop the fast-moving infantry.
Armour
Use the stand-off capabilities of their main gun to destroy weapon emplacements which hold up the infantry.
Use their firepower to maintain the momentum of the attack. An approaching main battle tank can have a deavstating effect on infantry morale!

Fire Support
Basically you don't want to move troops towards any objective without fire support.
You'll want to lay mortar rounds on suspected enemy positions and also smoke to obscure your movements or mislead the enemy.

HINT: Allocating AMMO to the status bars lets you see your ordnance situation at a glance. This Anti-Tank gun fits nicely in a trench. Ammo is low.
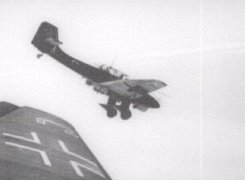
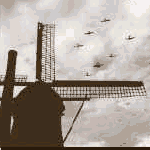
The Junkers Stuka dive-bomber was an effective form of fire support, often severely sapping enemy morale.
Combat Engineers in Close Combat 3 serve 2 main purposes:
To clear obstacles such as minefields
To use the flamethrower to clear infantry out of buildings and trenches. The flamethrower is also effective against armour. It's main drawback is that it's extremely vulnerable to retun fire. Wandering about the battlefield with a tank of kerosene on your back is not likely to see you collecting a pension at the end of the war!

Close Combat 4
After his successful trip into the future in Homeworld I thought it would be good to send P.C.back in time to World War 2, a person needs balance after all!

Introduction
A Brief overview by P.C.
The latest in the ever-growing line of the Close Combat series (#4) has been a regular on my hard drive for some months now. Playing from an overhead" perspective this real time strategy based in the Ardennes during WWII the "Battle of the Bulge" and puts you in command of either German or US Forces."
Your task force is normally limited to around 15 units of types that vary from a lone sniper to the Panther V tank, unlike previous versions you do not have control over the make up of the task force. There are a number of preset scenarios representing historically accurate missions or whole campaigns.
Battle of the Bulge also has a mission builder so you can create your own epics. Morale, leadership and tactics all have to be taken into consideration, so suicide mass attacks are generally out of the question.
Into the action
If you're familiar with previous versions of Close Combat you will be able to jump straight into this one, the interface has only been modified not totally revamped. If you are new to the genre then a quick read of the concise manual will have you into combat in no time at all.
After starting Close Combat your first decisions are:
Do I want to fight a single battle?
or a number of battles grouped into an operation?
or the whole campaign?
In this case I'm currently 9 days into a 16-day campaign and as you can see things are going pretty damn well for the Americans (luckily this time that's me).
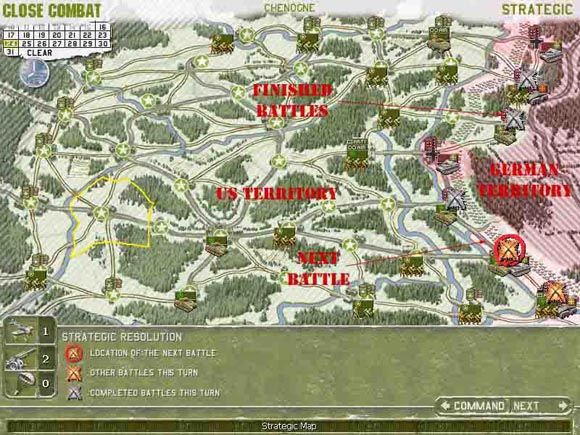
The strategic map is where you run the overall campaign from
At certain stages during each turn you can move your units by left clicking on them, a shaded area appears in adjoining sectors to indicate the areas they can move to.
Allocation of Artillery and Air support is also done here by dragging the relevant icon over to the unit selected. The country icon on each until indicates it's current health. Green is 'good', Orange is 'not so good' and red is 'hopeless', if a unit's operational health get low you can disband it. Troops from that unit will reform in your rear lines.
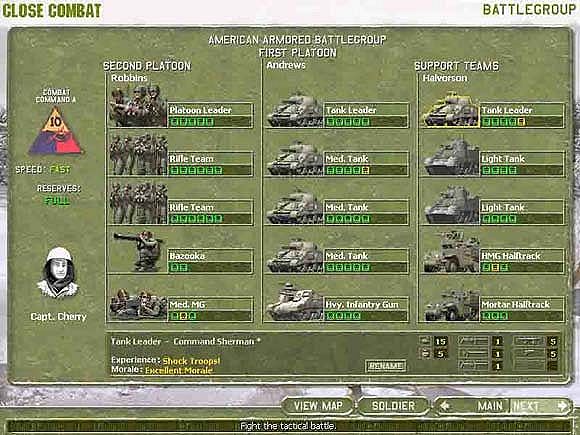
From the next screen you can see your battle group.
Units can be examined in detail by pressing the soldier button at the bottom of the screen. The button next to that is the 'view map' that takes you to a preview of the playing field.
After playing around here for a while go Back to the battle group page and click next, now we start getting into the good stuff.
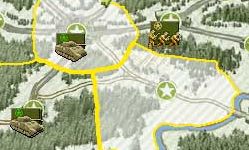
The troop deployment map shows the total area for this battle.
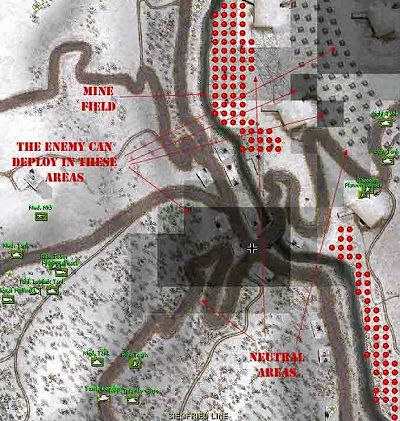
A few points of interest are:
Mine fields are shown in red (only when using this view)
Your troops can be deployed anywhere in the clear area
Neutral ground is indicated as a lightly shaded area
Enemy troops can deploy anywhere in the dark shaded areas
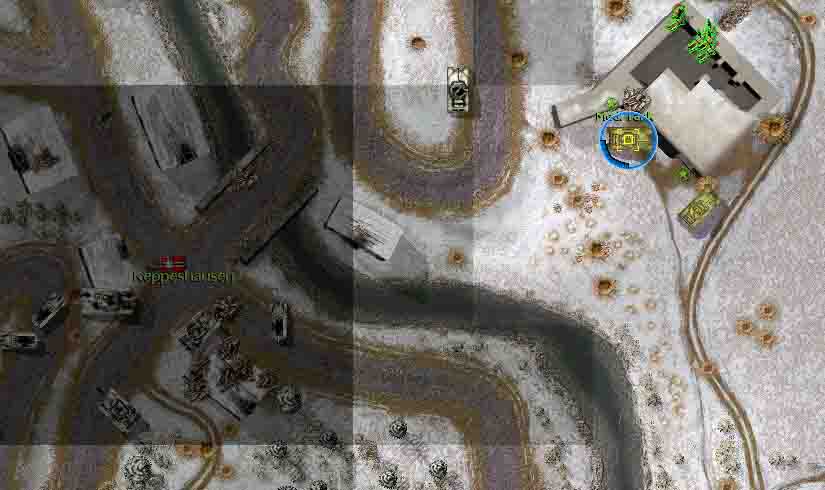
This picture shows the computers 'default' deployment of my troops, if you are feeling real brave this is fine. Occasionally I've tried this and usually the results are very bad.
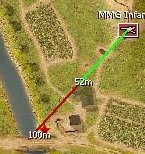
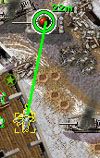
I find it best to try and set up ambushes, placing units with crossing fire lines. Check the line of fire by right clicking on the unit and selecting fire. The green line indicates a clear line of sight, the measurements indicate distances to obstructions and the red indicates 'no' line of sight.
It is also important to make sure the unit has the correct facing, selecting the 'defend' or 'ambush' options does this. The arc around the unit shows it's facing.
But it doesn't matter how good you are those Panthers are deadly and this is a common result of taking one on.

If you are lucky, this is the result:
If you've been allocated Artillery it is supposed to be available after 2 minutes.
Usually it seems to take a lot longer than that, but maybe that's just frustration. When it does become available you will receive verbal confirmation and the 'Artillery' icon at the bottom left of the screen will become coloured.
When you decide to use the Artillery just click on the icon and left click on the target area.
**** WARNING **** You only get one strike during each engagement AND they are not really accurate so keep you own troops away from the targeted area.
Here my troops are duking it out with a mechanised infantry, luckily there are a lot of buildings around to hide in. Those pumas and StuG's can really take the fun out of the day.
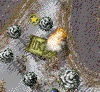
My medium infantry are taking the brunt of the German attack, sitting about 15 metres away from them is a StuG III and needless to say my boys don't really want to take it on all by themselves. More out of good luck than good planning I have a Bazooka team only 2 buildings away. Taking the safest route possible I order the Bazooka team into action.
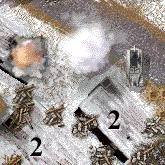
After a few very stressful minutes the Bazooka boys arrive, now I get them to sneak up to the window until they are finally within line of sight. Great - only 22 metres and the targeting reticle shows they have a good chance of penetrating the side armour.
Now I've just to wait and:
Hope my team can do the job
Hope the StuG doesn't see them, and
That there aren't any other German Forces nearby that I haven't seen yet
Fssshhhh-Bang-Boom. There's nothing like the sound of success and the yells of frustration from the German's.
Survived another engagement, but only just!

Hopefully if you do it right and lady luck is with you this will be your reward.