European Air War
Modding the Art
❝
European Air War Art Files- Readme!
(c) 1998, 1999 MicroProse Software, Inc / Hasbro, Inc All Rights Reserved.
Modifying the EAW art files is an unsupported feature, but it isn't terribly complicated. You'll need to be comfortable with moving files from folder to folder, opening up an MS-DOS window, typing basic DOS commands, and of course loading, changing and saving .PCX files with your drawing program.
This package contains textures for the aircraft exteriors (in the "Planes" folder), virtual cockpit interiors ("Cockpits" folder), which include the inside views of the wings, interior frames and cockpit dials, and the land textures (in the "Terrain" folder). There is also a utility called PicPac that is run from an MS-DOS prompt and which you must use to convert the raw .PCX data to EAW's compressed format. (The static cockpit views are hard-coded to only work in 640x480 mode, are very large and are not included--you can only change the virtual cockpit interiors with this kit).
For all files, the easiest method is probably to copy the files you want to change, along with the picpac.exe program, into a working folder that you've created, such as C:\TEXTURES. Make the changes to the files in this folder with your drawing program, run PicPac as described below, then copy the new compressed files directly into your EAW directory (usually in C:\Program Files\Microprose Software\European Air War). When EAW finds the new file in the directory, it will automatically use it instead of the defaults. If EAW
is not using your new plane file, recheck to make sure you've followed all the steps properly.
Changing Aircraft Exterior Textures ("Skins")
There are two texture files in each aircraft folder: one ending in "TEX.PCX", and one ending in "TRA.PCX" (example: "PP51BTEX.PCX" and "PP51BTRA.PCX" are the P51-B's textures). The TRA file is a "transparency" overlay that corresponds to the TEX file. Any area that is bright purple in the TRA overlay will cause the underlying TEX portion to be see-through. You should probably leave the TRA file alone unless you want to add windows or other see-through effects.
Follow these steps to change a plane's exterior paint scheme:
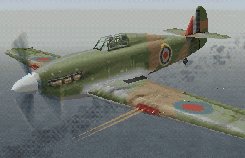
1. Load and alter the .PCX file as desired. This image size must remain at 256 by 256 pixels. You will see that the pieces of the wing, the tail and the other components that make up the aircraft are jumbled and pushed together on the texture page, so it may take some experimentation to figure out exactly what is what. Note though, that the aircraft paint schemes are symmetrical, so anything that appears on one half of the plane will be flipped (mirror image) onto the other side, except for the tail insignia.
2. When you are finished, save it as the same filename, and be sure to save it in the same (PCX) format.
3. Next, you need to resize the image to 128 by 128 pixels with your drawing program's resize function. You can omit this step, but at medium distances EAW will look for a 128x128 version of the plane's exterior, and if it doesn't find it will revert to the default texture. If you don't make major changes, you can get away with not creating this "low-res" version, but if you decide to paint the aircraft a different color it may look strange when it switches from the default low-res version to your high-res version.
4. Save the resized image with the same name, but instead of ...TEX, change it to end in ..TXS. So, for example, Pbb17tex.pcx (the 256x256 texture for the B-17) should be resized to 128x128 then saved as Pbb17txs.pcx.
5. Open up a DOS window (under Start, Programs, MS-DOS Prompt), and change the directory to your working folder (e.g. CD C:\TEXTURES). Run the PicPac program with the following format for each of the texture files you've altered;
picpac -p pbb17tex.pcx pbb17tex.tpc
In the given example, "pbb17tex.pcx" is the name of the file you are converting from, and the second name, "pbb17tex.tpc", is identical except that it ends in .tpc instead of .pcx. Also note that you must include the -p switch which copies over the palette.
If you created both a high-res and a low-res version, remember to use picpac on the low-res one too (e.g. picpac -p pbb17txs.pcx pbb17txs.tpc), and on the transparancy file if you changed that as well (e.g. pbb17tra.tpc).
6. The resulting .TPC files can then be dropped into your EAW folder and will automatically be used.
Troubleshooting: If the changes don't appear, check the location of the files. They should be sitting in your European Air War folder (alongside EAW's .exe). If that seem correct, check the naming of the files. They must be exactly as the originals, so pbb17tex.tpc can't be pb17tex.tpc or pbb17tex.pcx. Or if the changes do appear, but the colors are incorrect, try using picpac again and make
sure you include the -p option.
Changing the cockpit and interior textures
The process is the same as changing the exterior textures above, but the interior textures are hi-res only (256x256) so you don't have to resize them (steps 3 and 4, above). You can change the appearance of the cockpit dials, but the positioning and gauge needles are hard-coded and cannot be modified. Also note that you will have to change the inside view of the wings if you want them to match changes you made to the exterior, and vice-versa.
Changing the Terrain textures
The process is the same as changing the exterior plane textures, including how you must create both a high-res (256x256) and a low-res (128x128) version, but the naming convention is a little different. The supplied files are the high-res textures, and begin with BN as in BNField1.PCX. After you alter and save the high-res version, resize it to 128x128 as above and save it with the same name but beginning in LR instead of BN. So, BNField1.PCX becomes LRField1.PCX.
Then, when you run PicPac on the converted files, change the second name to end in .TER instead of .TPC, as in
picpac -p bnfield1.pcx bnfield1.ter and
picpac -p lrfield1.pcx lrfield1.ter
You should definitely make both hi-res and low-res versions of your terrain files, because depending on the user's ground detail setting and/or the video card, some or both may be used simultaneously.
Since the terrain textures are tiled together, you should be sure to keep rivers and roads, for example, starting and ending in the same place as the original, and keep things like city clusters or forest areas in the same general location as they were in the original image.
END
❞