| Carrier Takeoff |
|---|
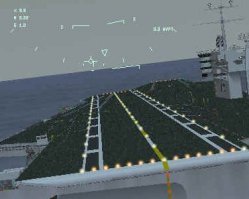
| You start here on the Carrier Deck. | 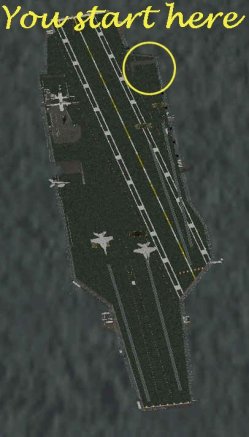 |
| Your plane starts here, ready to taxi to the waist catapult. | 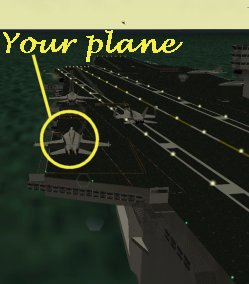 |
| Carrier deck plan from Digital Integration's F/A-18E Super Hornet manual. | 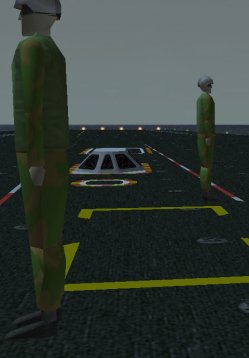 |
| Taxi |
|---|
| Check that your Throttle controller is fully in the idle position. | |
| Wheel Brake ON | W |
| APU on | Ctrl T |
| Left Engine On | Y |
| Right Engine On | U |
| Flaps to 1/2 | Shift F |
| or Auto Flaps | Ctrl F |
| Adjust HUD brightness to suit the lighting conditions |
| Set the DDIpages to suit you | Ctrl F |
| Check the bearing of the first waypoint so you will know which way to turn after takeoff |
| The Tower will say: | |
| Hornet Leader. Permission to taxi. |
| Hornet Leader . Proceed to cat. |
| Wait for the plane director to show you where to taxi to." |
| Increase Throttle | |
| (Note your speed when stationary is still 20 - 30 knots due to the forward motion of the carrier). |
| Release Wheel brake | W |
| Adjust Throttle until moving forward |
| Apply wheel brake to stop | W |
| Lock Launch Bar down | 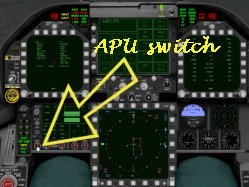 |
| 020 | |
| Auxiliary Power Unit | |
| 021 | 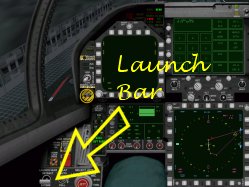 |
| The Launch Bar lever | |
| 022 | 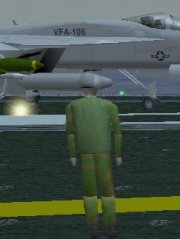 |
| 023 | 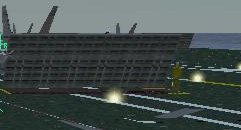 |
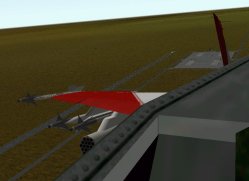
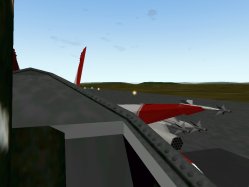
| Full Afterburner as the Plane Director scurries out of the way. |
| Catapult Launch Checklist |
|---|
| The tower will say: Hornet Leader, final turn up |
| Set throttle to 100 % |
| The tower will say: Hornet Leader, cut in burners |
| Set full Afterburner |
| Launch catapult | Shift C |
| WARNING: Do not touch the joystick during launch. The flight computer should place the a/c in a 15 degree climb. |
| Gear up | G |
| Flaps up | Shift F |
| Set a shallow climb |
| Throttle to MIL power |
| Turn to first waypoint |
| Execute a Fence Check |
| What a mixture of technologies! A steam catapult fed by a Nuclear Reactor lauches an aircraft burning fossil fuel. ... which makes like a pterodactyl to fly! Just another day on the CVN Ronald Reagan. | 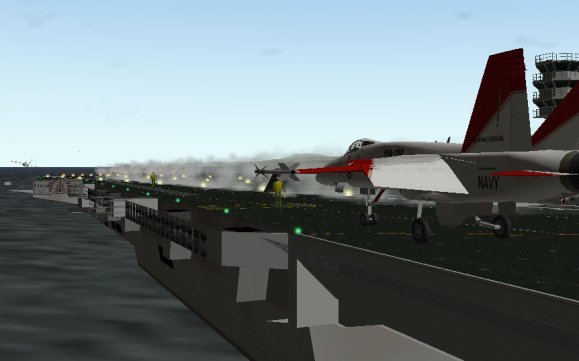 |
| Jet Blast Deflector - Burner selected |  |
| carrier-012 | 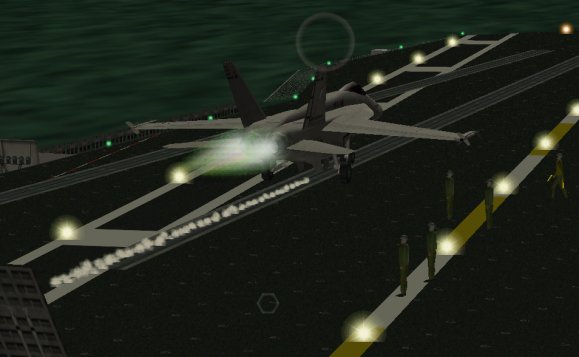 |
| On the way - Off the deck | 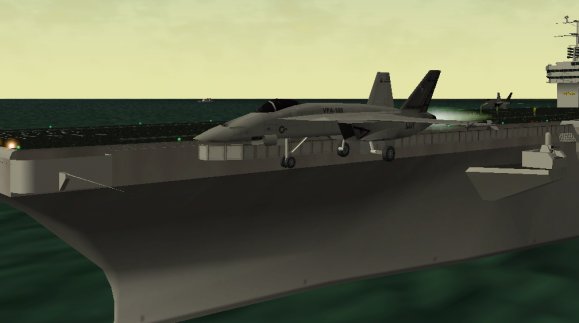 |
| Off the deck at 150 knots in 2 seconds. | 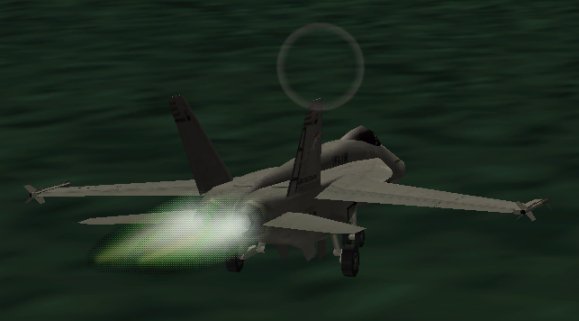 |
| After checking for a positive rate of climb, gear and flaps up. | 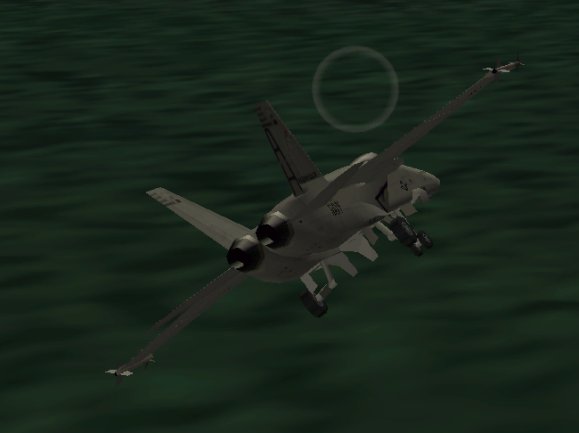 |
| Looking back at a cat launch in the intro video | 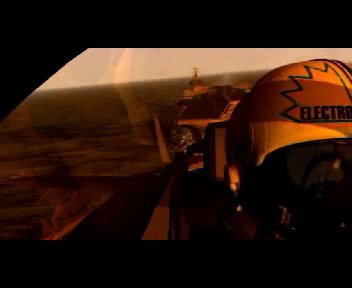 |
| Looking back at a cat launch in the sim | 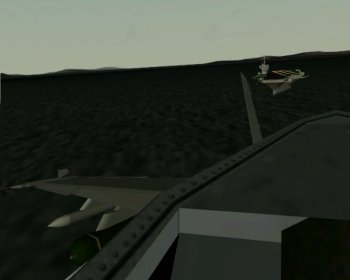 |
| Carrier Landing |
|---|
| 10 miles | |
| At 10 miles from the carrier you should just be able to see it, weather permitting |
| Altitude | 600 ft |
| Speed | 200 kts |
| Fence check | |
| If you leave Countermeasures on Automatic the ship's various radars can trigger the release of flares. |
| GEAR DOWN | G |
| FLAPS FULL | Shift F |
| HOOK DOWN | H |
| ACLS |
|---|
| Navigation Master Mode | End |
| carrier-001 | |
| Activate the Instrument Landing system | Activate the ILS |
| carrier-002 | |
| When the aircraft moves into the ILS the ship begins sending commands through the data link. | ILS data on the HUD |
|  |
| Select Autopilot |  |
| Set Autopilot Coupled Mode | Autopilot Mode |
| Auto Pilot ON | A |
| Engage Auto Throttle | |
| The aircraft will enter a circuit pattern and circle the carrier | Ctrl-A |
| As the a/c flies you over the carrier, request permission to land. |
| You may do a few circuits of the pattern before landing, you can use this opportunity to watch the other aircraft doing circuits and landing. As soon as the aircraft touches the deck, proceed to the touchdown checklist. |
|  |
| Hint: Letting the ACLS land the plane for you a few times is a great way to get a feel for the rhythm of a carrier landing. Watch the altitude and speed changes as the plane flies to touchdown. |
| Approach Point |
|---|
| Airspeed | 250 knots |
| Altitude | 1200 ft |
| GEAR DOWN | G |
| FLAPS DOWN | Shift F |
| HOOK DOWN | H |
| Now use the SEA radar and the TACAN indicator on the HUD to align yourself for landing. |
| carrier-006 | |
| The Hook lever is at lower left in the cockpit | |
| carrier-007 | |
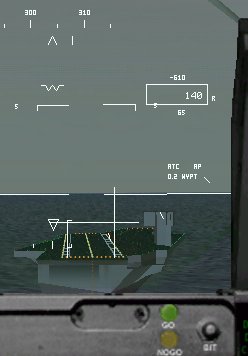
| As you get in visual range of the Carrier | |
| Speed | 140 kts |
| Throttle | ~ 75 % |
| Angle of Attack | .. |
| Rate of Descent | 700 - 900 fpm |
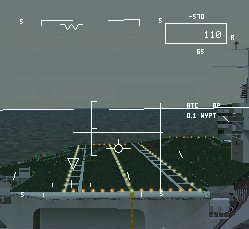
| The Fresnel Lens or "Meatball" |
|---|
| The Fresnel Lens Landing System is apparently modelled very accurately, but is only visible during the last 5 seconds of the approach. At this point the Landing Signals Officer is screaming directions at you: |
| A little left, "Above glideslope", "Below glideslope", "On glideslope", at the rate of about 2 instructions per second! I found there simply wasn't time to look at the Meatball. And following the cues on the HUD seemed to do the trick quite nicely. |
|  |
| The autopilot flies a perfect approach, every time. |
|  |
| Myself, on the other hand... | |
| Bolters and Waveoffs | |
| Throttle | max |
| Apply a very slight back pressure on the stick. Too much back pressuremay cause the exhaust nozzles to scrape the deck. |
| Check: | |
| - Airspeed increasing |
| - Altitude increasing |
| Flaps UP | Shift F |
| Gear UP | G |
|  |
| Ejection seats don't work too well under water. |
| Carrier Touchdown | |
| Throttle MAX | |
| In case of a bolter or waveoff |
| If the aircraft stops and rolls backward: |
| Retard throttle | |
| Raise HOOK | H |
| Taxi to parking area | |
| Shut down LEFT engine | Ctrl Y |
| Shut down Right engine | Ctrl Y |
| Congratulations.. you have landed! |
| |
| These guys are waiting patiently for your return... don't disappoint them! |
| HASELL checks |
|---|
| Heading | HUD |
| Altitude | HUD |
| Speed | HUD |
| Lookout | F2 then mouse |
| Location | Map |
| Note: You can drag the map display around with the mouse. |
|  |
| Heading, Altitude and Speed can be read very quickly from the HUD. |
|  |
| Check these every few seconds. |
| HUD Nav modes |
|---|
| |
| (a) Heading | The carat at centre of this scale indicates your current magnetic heading, in degrees. A heading of 000 corresponds to due north. As your aircraft turns right, the scale will move right to left, and vice versa. |
| Airspeed | Your airspeed is displayed in the box on the left side of the HUD. |
| Altitude | The boxed figure to the right of the HUD is your altitude, in feet. |
| Velocity vector | Indicates the point towards which you are flying. Its position relative to the pitch ladder indicates whether your aircraft is climbing or descending. Level flight is maintained by keeping the velocity vector on the zero pitch line. |
| Pitch ladder | The pitch ladder is a series of lines, drawn at 5-degree intervals, showing your pitch and roll attitude relative to the ground. |
| Bank angle scale | Shows your current bank angle (how much you have rolled the wings), and is calibrated at 5, 15, 30 and 45 degrees. Its triangular pointer slides back and forth along the top of the scale to indicate your current degree of roll. |
| Angle of attack | Also AoA, or alpha. |
| Your present angle of attack, in degrees. | |
| G load | Indicates current g force (the number of times normal gravity) affecting the aircraft |
| Text and image from Digital Integration's F/A-18E Super Hornet manual. |
| Takeoff |
|---|
| Look around for traffic | F2 |
|  |
| Remember that the engines act like a giant vacuum cleaner in front and a barbeque at the exhaust end. Always check for tourists, busloads of tourists, small children, small children in buses, animals and small children with animals before starting your engines. |
| Wheel Brake ON | |
| 002 |  |
| 05 | 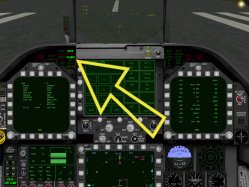 |
| Gear down and Wheel Brake ON. | |
| Gear down and Wheel Brake ON. | W |
| APU ON | |
| The Auxiliary Power Unit Switch |  |
| 003 | |
| When you engage the APU, the warning lights will flash... DO NOT PANIC! This is a normal self-test routine! | Ctrl T |
| Start Engine R | |
| The Right engine should be started first as this provides power to the Hydraulic system |
| Start Engine L | Y |
| Flaps to 1/2 | Shift F |
| Throttle to Full MIL Power | |
| Wheel Brake OFF | W |
| Afterburner | |
| Rotate at 145 knots |
| No back stick is needed to rotate |
| Climb out at 10 degrees pitch up. | 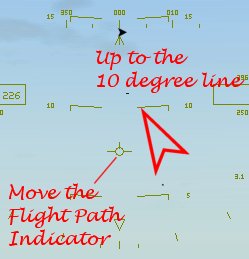 |
| Flaps UP | Shift F |
| Gear UP | G |
| Head to first Waypoint |
| MAP |
|---|
| Select Virtual Cockpit | F2 |
| Centre display with mouse | click on map display |