Mech Commander
MiGMan’s Combat Diary | 1998
The following notes are excerpted from a lecture I gave to the Inner Sphere Academy.
MiGMan
6 Steps to Success
- Recon
- Onboard sensors
- Manoeuvre
- Troops in Contact
- Fire Support
- Combat Engineering
The Missions
Operation 1 BEACHHEAD
- Mission 1: Liberate Work Camps
- Mission 2: Rescue
- Mission 3: SAR
- Mission 4: Attack a Base
- Mission 5: Defend a Position
- Mission 6: Search and Destroy
Operation 2 SKYHOOK
- Mission 1: Search and Rescue
- Mission 2: Destroy Generators
- Mission 3: Attack Convoy
- Mission 4: Destroy Comms Centre
- Mission 5: Destroy Supply Train
- Mission 6: Capture then Defend a Base
The job description seemed straightforward enough.
Sit in air-conditioned comfort aboard an Inner Sphere Command ship and sent squads of Mechs into battle on the planet below.
Why not?
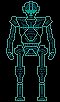
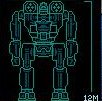
A 25 ton Commando Mech. All yours to play with!

Your mission Jim, should you decide to accept it.
I'd spent many days and nights giving orders in Command and Conquer, Red Alert and Dark Reign. What could be so difficult? I was soon to find out.
Remember that scene in Starship Troopers where the first invasion of the Klendathu planet is under way and our intrepid troopers run over a hill and smack bang into a horde of Warrior bugs?
Blow stuff up! This game is "Easter Egg Heaven!"
I found myself wondering aloud at the details.
"Wow, look at the details!" I said to myself. More than one time.
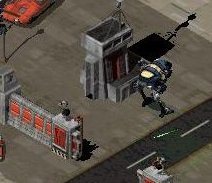
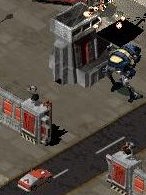
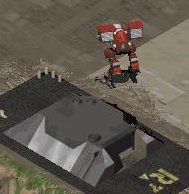
Blow up a vehicle and the crew run away, cranes loading trucks which bounce as the gravel falls in, trees getting knocked for six by running Mechs, distinctive footprints for different Mechs, fences getting trampled and so the list goes on.
There's a lot of stuff you can "interact with" (blow up).this is a war zone after all.
But real people live here too (real small people). You might come charging over a hill and find yourself (your Mech, that is) tramping through a shopping mall or stepping in a swimming pool next to a manor house.
FASA have created intricate and richly detailed landscapes for you to indulge your explosive escapades.

I found myself playing missions over and over just to get a good look around the neighbourhood.
6 Steps to Success
1. Command and Control
Bear in mind that a briefing is a series of educated guesses as to what you will encounter on the ground. The Fog of War hides many terrors, so expect to be surprised.
2. Weapon Requirements
Weapons come in two basic flavours: Beam Weapons and Projectile Weapons.
2a. Beam Weapons
In the past the development of Beam weapons is that they needed enormous energy sources. These energy sources tended to be bulky and heavy. Today's Mechs have solved this problem with the use of compact fusion reactors.
The seond main problem with beam weapons, and this remains, is they need time to deliver the energy on target.
We can usually assume that the prospective target will not oblige by standing still.
Pulsed Lasers deliver more energy per unit of time than conventional lasers but still fal far short of the efficiency of a projectile weapon.
Delivering some kinetic energy!
In the most basic of terms, the beam weapon has to heat the target until damage occurs. Therefore lasers are best deployed in groups, as one laser alone is more likely to cause aggravation than the spectacularly fatal damage we seek in battle. The main advantage of lasers is that as long as the Mech's fusion plant is running, they won't run out of ammo.
2b. Projectile Weapons
The time honoured way of delivering destruction is to send a small, dense package at high velocity. e.g. the gun.
Even better if the projectile itself contains a charge which explodes on contact. The cannon.
The main disadvantage of projectile weapons is that they will probably run out of ammunation just when you need it most!
Loadouts
Balance the loadouts of each Mech, and within a lance. Make sure they can defend at close range as well as attacking at long range. Also bear in mind that it takes time to fire a different weapon... so you might be best off using only one type within each range.. short, medium and long. This topic is one area where art comes into play. The situations are so fluid that you will have to develop your own style of command and favoured weapon combinations.
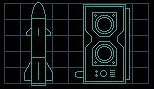
Short range Missile pack
Hunchback Mech
Select your Mechwarriors
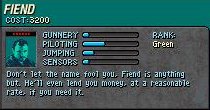
Duke Nukem types need not apply for command positions! Your MechWarriors will supply the guts... you supply the brains. Mech Commander is not a game of sacrificing mindless minions. Your warriors have their own distinct personalities and attributes. Get to know them.
Knowing the sound of their voices helps to sort out what is often very dense voice traffic in battle. Your Mech Pilots are already elite members of the militrary, but there is still no substitute for experience under fire. Therefore take the rating "Green" as a relative one, all the pilots are competent drivers and professional soldiers.
Pilot attributes
Pilots will suffer battle fatigue if you send them on more than two consecutive missions... watch the red dots above the pilot picture. Six dots indicates a well rested pilot.
Select your Route
Remember that no plan survives contact with the enemy, but if you send your Mechs into battle with no plan at all... you'd better start writing those letters to relatives!
- Print out the mission map prior to launching
- Mark high ground as Observation points
- Mark bridges and paths through forest as chokepoints
- Plan routes to the mission objectives
- Avoid roads as enemy vehivles will likely be patrolling these
- Use the all-terrain capabilities of your Mechs, including the ability of some Mechs to jump over obstacles
- Pick a key terrain objective for each movement stage. e.g. "move to the intersection" or "move to the hill"
- Always have an alternate route planned in case the preferred route gets "too hot".
- Mark alternate routes with a dotted line
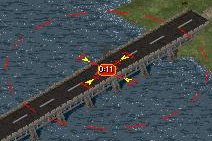
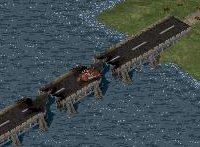
Taking out a bridge with a large artillery strike
Sometimes you will have fire support available in the form of small and large artillery strikes. These are good for taking out enemy defenses, slowing an enemy attack or destroying bridges.
On the ground.
2. Recon
Visual recon.
Nothing yet beats the "Mk I Human Eyeball" for getting a positive ID on enemy targets.
Use the high ground. Line of sight increases dramatically from elevated positions in Mech Commander.
Most maps will have vantage points from which you gain valuable overviews of the battlefield. Also remember that artillery strikes can't be targete wihout a clear line-of-sight to the target.
Use the MFD
Use the Multi Function Display ... a lot! After a couple of days of playing (and copping a hiding) I realised that I had been neglecting the MFD map.
My mouse was busy darting about the tactical map and never seemed to make it up to the MFD.
Learn the keyboard shortcuts (or use a Saitek PC Dash) to control the MFD and Mech movement commands. This allows your mouse cursor more time on the tactical display, designating targets and destinations.
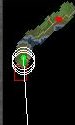
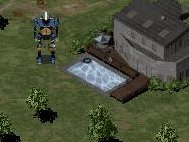
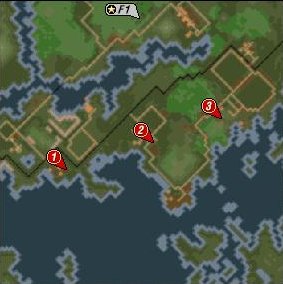
Sensor Contact to the south and visual contact to the North East
An online database is available through the MFD. Use it to get data on enemy vehicle and Mechs. Use the database to plan attacks to take advantage of gaps in the enemy weapons ranges.
On-board Sensors
On-board sensors combine input from:
- Infra Red - IR
- Seismic - listening for footsteps, a high tech variant of the old American Indian ear-to-the-ground trick
- Magnetic Anomaly Detectors - MAD
Then they present the contact as a verbal warning and a contact bearing on the MFD.
Degradation of your sensor coverage occurs as the Mechs move, depending on your pilot's experience level.

Sometimes brigade will supply additional recon assets, which can be accessed via the support menu on the MFD.
Manoeuver
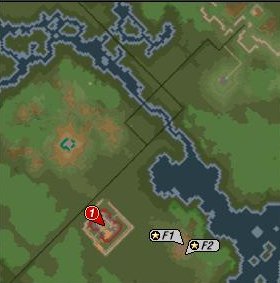
To select a group of Mechs use the function keys F1 to F4.
To select individual Mechs it is usually quickest to click on the icons at the bottom of the screen. When you select a Mech it will show as a green light on your MFD.
Move to specific terrain objectives: hilltop, river bend, intersection. Give your troops a definite destination, check your sensors and prepare for the next move.
Use available cover
Forests and "dead ground" behind hills are effective at hiding your movements from enemy view.
Power Down
When Mechs are inactive for a period, e.g. when wating for the results of recon efforts, power down (Page Down key) to minimise chances of detection by enemy sensors.
Bounding Overwatch
Advance using Bounding Overwatch. One element A remains stationary and provides covering fire for the manoeuvering element B. Then the elements swap roles, element B providing cover for element A as it moves.
Attack
A deliberate attack on an enemy installation requires planning. Try to capture Turret and Gate control building
Troops in Contact
Mech vs Mech
Select your attacking Lance F1 to F4
Designate the target Mouse
Your Mechs will move in and attack
Select one Mech from the control bar
Designate for Medium or Long range Attack M or L
Select a closer Mech and move it quickly to the rear of the enemy (where the armour is thinner)
Crippling for Salvage
If combat is progressing well:
Designate for a leg shot to immobilise Kpad 1 or 3
OR
Designate for a head shot Kpad 8
Mechs versus Vehicles
Individual vehicles don't pose much of a threat, but they can wear your Mechs down and deplete valuable ammunition.
If time permits:
Get info on the vehicle I
Check it's weapons range
Fight it at a range where there is a gap in it's weapons coverage.
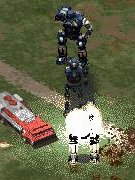
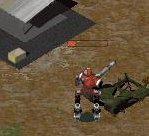
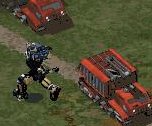
Concentrate firepower by ordering all Mechs to destroy the vehicle
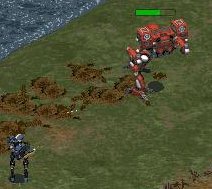
By getting in close the Mechs have managed to damage this MadCat
Fire Support
Weapon Requirements
Type | Time to Arrival | Damage radius | Duration
Small arty strike | ~ 7 seconds | ~ 50 metres
Large arty strike | ~ 14 secs | ~ 75 metres
Sensor Probe | 2 minutes
Camera Drone | Until destroyed
Fire Support is called in via the MFD. Note that you must have visual contact with the target area.
Large or small Artillery strikes will demolish a bridge.
They cause a fair amount of damage to light Mechs, but minimal damage against heavy Mechs.
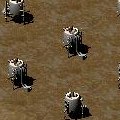
A cluster of vehicles is a prime target for an artillery strike.
Combat Engineering
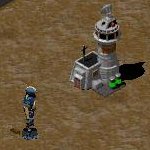
Capture supplies and Buildings
Be constantly on the lookout for enemy structures with salvageable parts inside. Pass the mouse cursor over structures and the salvage icon will appear if there are parts inside.
Of course your Mechs don't actually carry the parts out in a little Red Wagon! They mark them for retrieval by salvage teams.
Containers often contain weapons, which are valuable as the Clan variants are usually lighter than their Inner Spehere relatives.
Repairing Mechs
Take a Refit Truck when they are available.
They cost 4500 resource points and are not recovered from the mission, but if you anticipate a slugfest it's a worthwhile write-off. It also saves you on repair bills after the mission, more importantly it means you can take potent weapons such as the Gauss Rifle and Autocannon and reload during the mission. Enemy repair bays are also capturable, though they have a finite repair capacity.
Minefields
The minelayer costs 9000 resource points, but it can be invaluable, especially against enemy vehicles.
Cheat Codes
These are necessary - believe me! After mission 16 it gets so tough that, well put it this way, in a conversation I had with Jordan Weismann (creator of the Mech Universe) he admitted that the development of development of Mech Commander had one flaw common in gaming:: The "TFH syndrome". (Too Fxxxing Hard).
Anyway, on to the cheats:
Mad Cat Start File - click here to get a Mad Cat in Mission One!
A word about the cheats (from FASA):
Logistics Cheats
These cheats must be typed in during the Logistics Phase.
- poundofflesh - Adds 1,000,000 Resource Points.
- rockandrollpeople - Removes Drop Weight Limit on current mission.
- Gameplay Cheats
- These cheats must be typed in during the mission.
- CTRL-ALT-W - Jumps to "Mission Sucessful" screen.
- osmium - Makes your 'Mechs and vehicles invincible.
- lorrie - Repairs damaged Armor/Weapons.
- lordbunny - Gives you unlimited, instantaneous artillery strikes. Press b and left-click to nuke the target.
- mineeyeshaveseentheglory - Reveals the entire map.
- deadeye - Max Gunnery skill on all MechWarriors
- framegraph - Not really a cheat, but it's cool and undocumented. Shows a graph of MechCommander's framerate over time
The Missions
Operation 1 BEACHHEAD
MISSION 1: Liberate Work Camps
Equip at least 1 Mech with some long range weapons to take out fixed defenses.
Put a good shooter in this Mech.
Look for the high ground.
Don't forget to look for salvage.
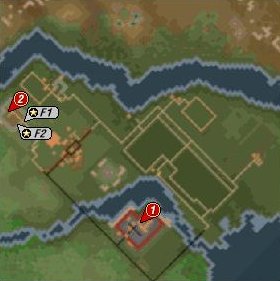
MISSION 2 Rescue
You'll need to burn an exit through the forest to get out of the drop zone. Don't forget to press BackSpace to conserve ammo.
You might want to use the artillery strike on the bridge to slow down reinforcements.
Capturing Enemy Command Vehicles often reveals valuable intelligence.
An artillery strike is often a good prelude to rushing the enemy.
Move quickly and decisively before enemy reinforcements arrive.
Hollander II
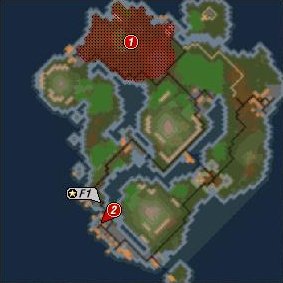
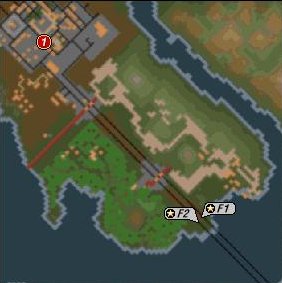
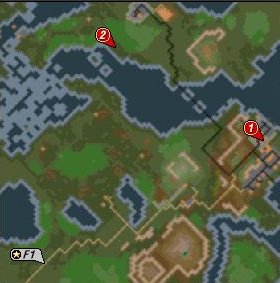
MISSION 3: Search and Rescue
The shortest route looks like up the left hand side of the island. In fact it looks a bit too easy so you'd be wise to have alternate routes planned.
Water forms a huge natural obstacle in the centre of the island.
Remember that your Mechs can run, and don't start a fight you can't finish.
On the other hand well placed artillery strikes are effective, especially near gas storage facilities!
And knowledge of the enemy's weapon ranges can be a big advantage.
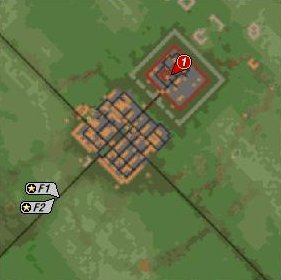
Mission 4: Attack a Base
This is the first mission requiring a deliberate attack on a well fortified base.
Look for volatile targets and try to capture the turret and gate control buildings.
Mission 5: Defend a Position
Your first attempt at defending a fixed position.
A high paced, intense mission. Pick the essential chokepoints and lay mines as quickly as possible.
Mission 6: Search and Destroy
Search and destroy Clan Mechs in an industrial zone.
I suggest you don't try and enter through the front gate!
Remember that if you capture gate control and turret buildings, they will turn on the enemy!
Operation 2 SKYHOOK
Mission 1: Search and Rescue
A desperate mission to rescue a stranded Inner Sphere Mech.
Move very quickly.
Take out enemy spotter vehicles before they call airstrikes in.
Avoid built up areas.
Mission 2: Destroy Generators
Destroy 2 powerplants.
A refit truck is essential if you expect to pick up all the salvage (advisable).
Look out for perimeter alarms and target vehicle barracks before the crews get into action.
Mission 3: Attack Convoy
Jump capable Mechs are called for in the briefing... but I suggets it might be a case of jumping from the frying pan into the fire! Unless all your Mechs are jump-capable I suggest quick-timing it to the lowest river crossing and setting up an ambush.
Mission 4: Destroy Comms Centre
You have at least two basic tactical choices here:
- Slow deliberate assault using heavy Mechs
- Rapid incursion with lighter Mechs. Look for alternate routes through the forest.
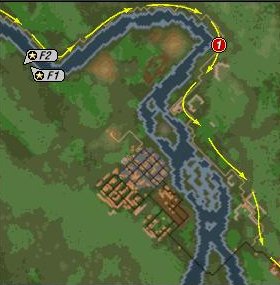
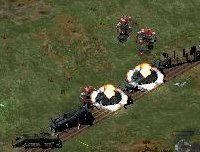
Mission 5: Destroy Supply Train
Head for the tracks and set up an ambush. Simple eh.

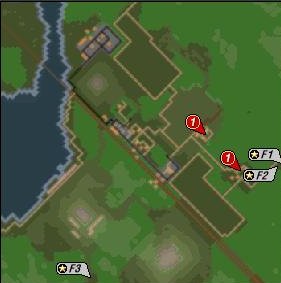
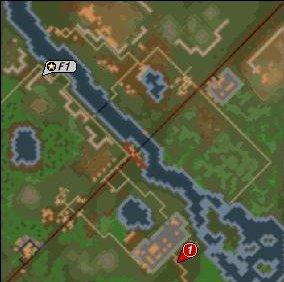
MISSION 6: Capture then Defend a Position.
There are two distinct phases to this operation: Assault and Defense. Perhaps a mine layer would be useful in defense? Definitely take a Refit Truck! Use a light Mech to spot artillery strikers on the bridges to the Northeast. Now you see why these maps are handy?