Thunderjets over Korea
Campaign
From the excellent manual. The documentation is exemplary.
❝
F-84e 001 - Scramble
" Your airfield is under attack by a flight of four Yak-9s. Your flight of four F-84e Thunderjets must scramble and destroy them.
The enemy will inevitably inflict some damage to their ground targets, so don't get frustrated if the whole airfield appears to be blowing up around you - this is war. Just do your best to hang in there and destroy them.
You'll particularly have to manage your energy to get behind the Yaks and stay there long enough to pump them full of bullets. A single notch of trim-up will help tighten your turns, and extending the air brake will help you prevent an overshoot.
After a short while, a flight of four F-51 Mustangs come to your aid, and the tide will turn for the better. However, with all those friendlies up there, be careful not to get caught in a mid-air collision.
Soon after the F-51s arrive, a second wave of four more Yak-9s, will attempt to bomb the airfield. They should now be greatly outnumbered, and the F-51s will help you destroy them. When all eight Yak-9s are dead, or out of range, you may complete your waypoint path and land. The strip at Kimpo runs 143 degrees/323 degrees, and you may land from either end. Once you have come to a stop on the runway, you must then press X to end the mission. Alternatively, you may wish to press X repeatedly in order to warp through the waypoints and end the mission without landing.
One of our Beta testers recommended the use of timed rockets to hit the Yak-9s before they had chance to drop their bombs: "As a quirk of unlimited ammo, I had timed rockets aboard. As I roll down the runway for takeoff, I target all of them. At lift-off, gear up, they're about 7K meters away and closing fast. I fire a salvo of rockets, and get them ALL! (well, the first time I got 3 out of 4). The timed rockets go off at a range of 3K meters. Have learned from and used them successfully in CFS's stock and imported WWII missions. You still have to learn to aim them to be effective. You just can't let loose and hope to get lucky. That's what happened to me the first time, when one Yak got thru, but was trailing smoke. Its a matter of timing your judgement, speed/distance of enemy, and a little luck." "
❞
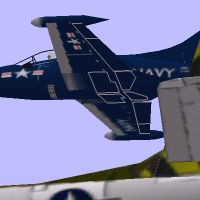
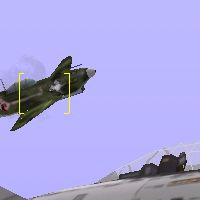
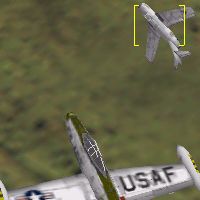
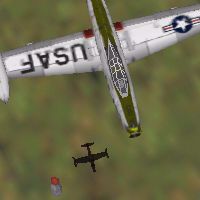
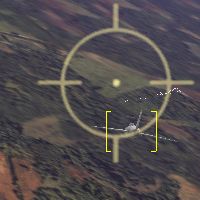
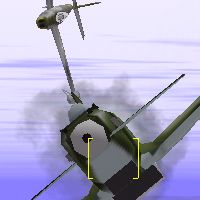
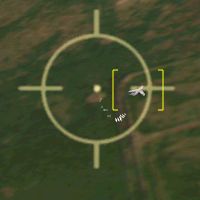
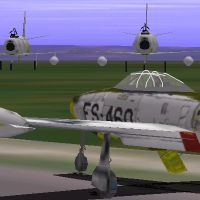
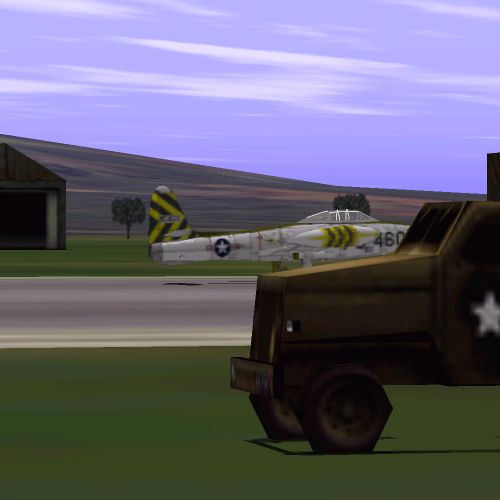
Some of my favourite gun camera snaps and theatre footage taken by my trusty wingman.


❝
F-84e 002 - CAP
" It's several days later, and most of the damage to the airfield has been repaired. You and your wingman are sent up on a routine Combat Air Patrol to hunt and kill North Korean aircraft.
You pass four F-80 Shooting Stars at Waypoint 1, which are there for atmosphere only, and all seems very quiet. A little further, and you'll pass four F-51s going your way, who may have some bearing on later events. Soon after turning South at Waypoint 2, however, you encounter four Yak-9s Flying way below you.
The Yak-9s will be as troublesome to kill as always, but they are not invincible. If you can at least keep them busy for five minutes, that group of four F-51s will join in and make easy meat of the Yaks. (You'll just have the embarassment of being obliged to buy those prop jockeys several rounds of drinks at the OC when you get back;-).
Once the 4 Yaks are destroyed, you may complete your waypoint path and land. If you intend to land, note that your last waypoint is 4: "Contact Tower". On reaching this point, you may be advised to call up your ADF (Shift+5), and tune in Kimpo: 93 - this will aid you to get the correct line-up for the runway. The strip runs 143 degrees/323 degrees, and you may land from either end. Once you have successfully landed and set your park brake, you must then press X to end the mission. Alternatively, you may wish to press X repeatedly in order to warp through the waypoints and end the mission without landing. "
❞
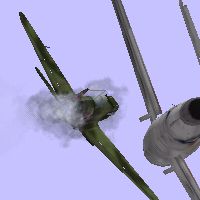
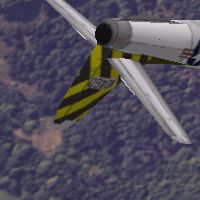
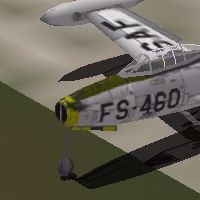
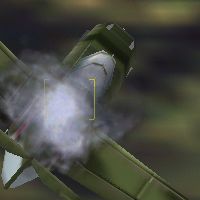
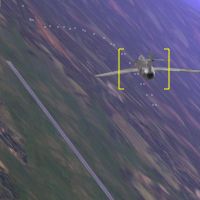
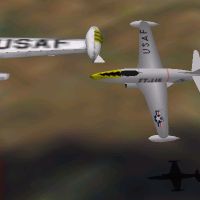
Some of my favourite gun camera snaps and theatre footage taken by my trusty wingman.
❝
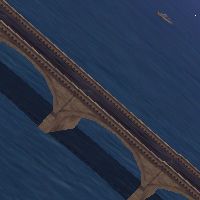
F-84e 003 - Bridge Busting
" Your flight of four Thunderjets is tasked with bombing an important bridge on a major North Korean supply route.
As you perform your pre-flight checks, you'll see four B-26c Invaders taking off over the parallel runway and heading North. These are just for atmosphere.
Your formation flies low at 5000' along the coast to the West, then turns North to the initial point at Waypoint 2.
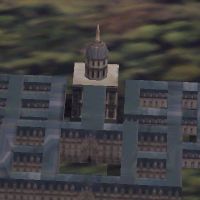
Here, you turn 90 degrees East and head for the bridge just inland from the coastline. You'll see a large building on the South side of the estuary which will confirm your position. This is not a target.
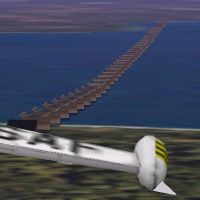
As you approach the bridge, you'll come under fire from a gunboat, and having passed over the bridge, you will come under fire from a second gunboat. Your wingmen may have difficulty duelling with the gunboats, so you should pull slightly ahead of the formation and use your rockets to neutralise the threat. Your wingmen should handle the bridge quite nicely on their own, but if any of the centre spans (the important ones are labelled) are still standing, you can take them out yourself, with either bombs or rockets.
Once the bridge is down, you continue Eastwards, where some time after passing waypoint 3 you run into four MiG-15s. It's a pretty even fight, and you should find it fairly easy to get on their tails and hang there, since their flying speeds are similar to yours. They won't be as tricky as the Yak-9s.
Once the four MiGs are despatched, you may complete your waypoint path and land. If you intend to land, note that your last waypoint is 4: "Contact Tower". On reaching this point, you may be advised to call up your ADF (Shift+5), and tune in Kimpo: 93 - this will aid you to get the correct line-up for the runway. The strip runs 143 degrees/323 degrees, and you may land from either end. Once you have successfully landed and set your park brake, you must then press X to end the mission. Alternatively, you may wish to press X repeatedly in order to warp through the waypoints and end the mission without landing. "
❞
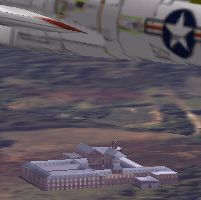
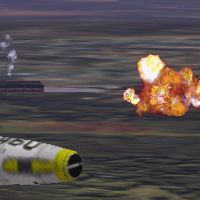
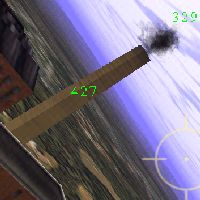
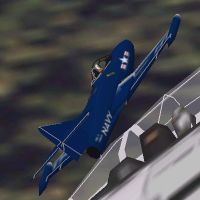
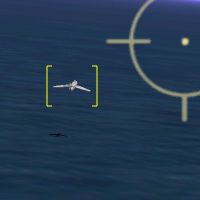
Some of my favourite gun camera snaps and theatre footage taken by my trusty wingman.
❝
F-84e 004 - Flameout
" This Mission was written specifically to take advantage of a neat concept by Gregg Bond, (brought to reality by P.H.F. Burnage), which converts an aircraft into a glider and enables you to predict exactly where it will land.
It had occurred to me that this could provide the basis for a downed pilot mission, but this time with the added bonus that you would actually be able to witness the pilot performing the crash-landing, rather than him already being on the ground.
You start out in the air, with your wingman already suffering engine trouble. He will be flying quite slowly, so you'll have to throttle back and circle around in order to monitor his descent, but don't get too close or your jetwash may cause him problems with turbulence.
He'll land quite near to the tower labelled "Kangso Monument", where one would imagine he would attempt to take cover. It's a good idea to roughly mark his position on the radio compass, so that you can find him again if you fly too far away.
Radio Compass:
- Popping up the radio compass switch (shift+4)
- Call up the Instrument panel (shift+2)
- Clicking the switch to the ON position with the mouse
- You may have to click ON/OFF and ON again to get the needle to catch, but when it points down to 180 degrees, you'll know the position is marked.
You should now set up a circular flight pattern around your wingman to monitor the approach of any enemy aircraft or troops, and almost immediately, you should be noticing a convoy of eight troop-transport trucks advancing from the east, and a group of four tanks approaching from the west. You should use your rockets or guns to destroy these threats before they get to your wingman's plane and capture or kill him.
About ten minutes into the mission, you'll be buzzed by a lone MiG-15 from the north, who will attempt to strafe the downed F-84. You must engage and destroy him.
Within the next two minutes, you'll spot an approaching M*A*S*H Helo which is intending to airlift your wingman out to safety, and unless you take out the MiG, there is the danger that he might decide to shoot down the Helo. Soon after, you should be overflown by four Banshees from the Valley Forge who are tasked with relieving you and escorting the M*A*S*H Helo and your wingman to the nearest airbase."
If the MiG is dead, and the Banshees have arrived, your Mission is over. Give your wingman one last flypast, dip your wings to say farewell, and head back to Kimpo. On approaching the airfield you will be greeted by the sight of four F-80 Banshees taking off and heading north to relieve the Banshees and provide top cover for the M*A*S*H Helo. (It's a comforting thought that if you ever have to crash land or bail out over enemy territory, these guys would do just the same for you.)
NOTE: If at any time during the mission you get the message "damaged F-84e destroyed", you can safely assume that your wingman decided to self-destruct his Thunderjet to prevent it falling into enemy hands. He will be fine, and once the M*A*S*H unit have patched him up he'll be celebrating with you and those Valley Forge pukes down at the OC.
❞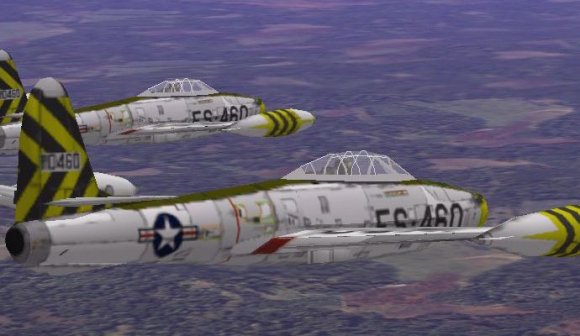
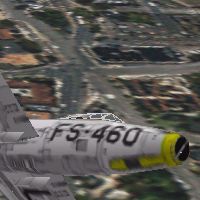
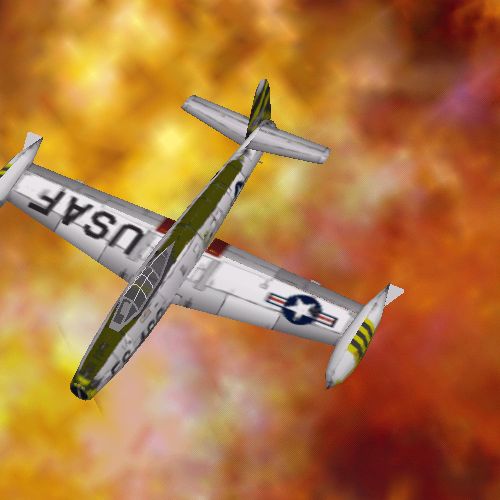
Some of my favourite gun camera snaps and theatre footage taken by my trusty wingman.
❝
F-84e 005 - MiGCAP
You and your wingman are sent north to hunt and kill MiGs.
As you take-off you'll see a C-47 Transport circling the airfield to land.
You reach waypoint one at a recommended 10,000' without event, but a few minutes later you bounce two low-flying MiG-15s heading in the opposite direction. These must be destroyed.
Resuming your flight path and regaining your 10,000' cruise altitude, you reach waypoint 2, where you meet up with a flight of four friendly F-86 Sabre jets en route to Kimpo from Itazuke. You take the opportunity to keep pace with them, and get a good look at the next generation, swept-wing jet fighter.
Suddenly, two more Mig-15s are spotted, and it's back to business as you and your wingman engage them.
Eager to show their skills, the Sabre pilots join in, and if you're not too careful you could find yourself accidentally causing or receiving friendly fire, not to mention the dangers of a mid-air collision. Hopefully you and your wingman will make short work of the MiGs and show those Sabre boys that in the right hands, there's still plenty of mileage left in the Thunderjet.
Having despatched the MiGs, you may complete your waypoint path and land. If you intend to land, note that your last waypoint is 4: "Contact Tower". On reaching this point, you may be advised to call up your ADF (Shift+5), and tune in Kimpo: 93 - this will aid you to get the correct line-up for the runway. The strip runs 143 degrees/323 degrees, and you may land from either end. Once you have successfully landed and set your park brake, you must then press X to end the mission. Alternatively, you may wish to press X repeatedly in order to warp through the waypoints and end the mission without landing. "
❞
Some of my favourite gun camera snaps and theatre footage taken by my trusty wingman.

❝
F-84e 006 - Rail Strike
Your flight of four Thunderjets is tasked with striking the railyard at Changyon.
As you take-off, you see a flight of four Sabre Jets coming in over the airfield, before you turn east for the long haul to the target area.
As you approach the railyard at 3000', your will see a couple of locomotives, various flat-cars, box-cars and fuel wagons, plus some fuel storage tanks: These are all legitimate targets.
The railyard building itself is not a target, and the dp file in this package has been adjusted to make it impossible to destroy - the original CFS dp file would allow the building to be destroyed with one bullet hit, which would cause the building to vanish and take everything with it! If you allow your wingmen to go in first, they'll make a pretty good job of taking out most of the targets in one pass. This is because, being closely packed, the targets tend to damage each other when they catch fire, in a sort of explosive chain reaction. You can then go in and selectively mop up the rest with some well-aimed rockets.
On the way out, soon after waypoint 3, you'll run into a couple of MiG-15s, which should not be too difficult to destroy. If you take too long, and the fight drags south, a flight of four Panthers from the Valley Forge may pitch in. Otherwise, you'll pass them as you approach waypoint 4.
Once the MiGs are destroyed, you may complete your waypoint path and land. If you intend to land, note that your last waypoint is 5: "Contact Tower". On reaching this point, you may be advised to call up your ADF (Shift+5), and tune in Kimpo: 93 - this will aid you to get the correct line-up for the runway. The strip runs 143 degrees/323 degrees, and you may land from either end. Once you have successfully landed and set your park brake, you must then press X to end the mission. Alternatively, you may wish to press X repeatedly in order to warp through the waypoints and end the mission without landing. "
❞
Some of my favourite gun camera snaps and theatre footage taken by my trusty wingman.

❝
F-84e 007 - Interdiction
After take-off, your flight of four Thunderjets heads north to Waypoint 1 at Kaesong, where you'll locate and destroy two groups of enemy troop-transport concentrations. There are four F-51s already working the area, so your job is basically mopping up, although if you let your wingmen get ahead of you, they'll do a terrific carpet-bombing swoop over the nearest group.
Depending on how long you spend there, you'll be bounced by a couple of courageous Yak-9 pilots, either over Kaesong, or on your way to Waypoint 2. Unless you destroy them quickly, they will hold back your flight from advancing to the next target: an enemy Truck and Tank convoy heading South from Waypoint 2.
However, whilst you are engaging the Yaks, it is possible that some of your wingmen and the F-51s may detach and press on to hit the convoy. If this happens, they'll waken up a couple of La-7s flying top cover, and you may get some anxious radio messages from your team. You must kill the Yaks, fly on to waypoint 2 and take out the convoy, and kill the La-7s - but not necessarily in that order.
Your wingmen and the F-51 pilots will tend to concentrate on the ground targets, but if attacked by the enemy aircraft, will fight back. This mission is pretty fluid and will fly differently each time: Depending on how long you take to sort out the Yaks, you may find that your wingmen and the F-51s have already downed both La-7s and destroyed the convoy.
Once all these targets are destroyed, you may complete your waypoint path and land. If you intend to land, note that your last waypoint is 4: "Contact Tower". On reaching this point, you may be advised to call up your ADF (Shift+5), and tune in Kimpo: 93 - this will aid you to get the correct line-up for the runway. The strip runs 143 degrees/323 degrees, and you may land from either end. Once you have successfully landed and set your park brake, you must then press X to end the mission. Alternatively, you may wish to press X repeatedly in order to warp through the waypoints and end the mission without landing. "
❞
Some of my favourite gun camera snaps and theatre footage taken by my trusty wingman.

❝
F-84e 008 - Bomber Escort
Your flight of four Thunderjets is to escort four F-51 Mustangs tasked with bombing a North Korean Army Camp East of Uijungbu, and as you take-off, you'll see them already leaving the field ahead of you. The difficulty here is to keep pace with the Mustangs, and not lose them.
They are much slower aircraft than the Thunderjet, so you will have to throttle back and trim up to maintain a speed of around 270 Kts or lower. It is also a very bad idea to "press X" and warp to the next Waypoint, despite the constant reminders from the obligatory blue Microsoft message. If you warp, you will most certainly lose track of the Mustangs.
You arrive at the target area just after Waypoint 2, and from your high perch at 10,000' you should get a good view of the Mustangs blowing up the camp. They may not get everything on the first pass, but do not be tempted to help them out just yet. As the F-51s circle round for a second run, you will spot a flight of four low-flying MiG-15s diverting to the area, and your job is to terminate them before they get to the Mustangs.
If the MiG-15s prove difficult, and the fight drags on, you'll be rescued by a flight of four Sabre Jets flying North on Combat Air Patrol. However, with so many aircraft flying around, your major problem now becomes the risk of a mid-air collision.
Once the MiGs are dead, you may like to expend any remaining ordnance on whatever is left of the Army Camp.
With all targets destroyed, you may complete your waypoint path and land. If you intend to land, note that your last waypoint is 4: "Contact Tower". On reaching this point, you may be advised to call up your ADF (Shift+5), and tune in Kimpo: 93 - this will aid you to get the correct line-up for the runway. The strip runs 143 degrees/323 degrees, and you may land from either end. Once you have successfully landed and set your park brake, you must then press X to end the mission. Alternatively, you may wish to press X repeatedly in order to warp through the waypoints and end the mission without landing. "
❞
Some of my favourite gun camera snaps and theatre footage taken by my trusty wingman.

❝
F-84e 009 - Ground Strike
Your Flight of two Thunderjets is sent to destroy an Oil dump south-east of Sinmak, which is an old North Korean airfield, presumed disused.
As you reach waypoint 2, and begin your turn to the target area, you will spot the airstrip on your left. Depending on how near you have drifted to the airfield, the next thing that happens is that you will either spot two MiG-15s beginning their take-off roll, or you will spot the ground targets.
If you ignore the MiGs and descend to the ground targets, you can actually get the MiGs to lose sight of you, and if Pell is sticking with you, the two of you can make a perfect single pass over the Oil dump and destroy all the targets. At that point, you'll get your waypoint marker back, and be able to continue your waypoint path.
However, Pell may not stick with you, and ignoring Mission orders may try to score some MiG kills, which he is perfectly capable of doing on his own. It's your decision as to whether to get embroiled in returning to Sinmak to help him out, or to follow orders and continue back home to Kimpo.
Whatever you decide, two F-86 Sabres will pass near Sinmak fairly soon, and engage the MiGs themselves.
Nothing else will happen on your route home, until you pass waypoint 5 over Chunchon, where turning east to Kimpo, you will run into two more MiGs. A couple of F-80 Shooting Stars are also in this vicinity and may already have bounced the MiGs, or may help you out if the fight drags east.
To win this mission, you only need to hit the ground targets, everything else is optional.
With all targets destroyed, you may complete your waypoint path and land. If you intend to land, note that your last waypoint is 6: "Contact Tower". On reaching this point, you may be advised to call up your ADF (Shift+5), and tune in Kimpo: 93 - this will aid you to get the correct line-up for the runway. The strip runs 143 degrees/323 degrees, and you may land from either end. Once you have successfully landed and set your park brake, you must then press X to end the mission. Alternatively, you may wish to press X repeatedly in order to warp through the remaining waypoints and end the mission without landing. "
❞
Some of my favourite gun camera snaps and theatre footage taken by my trusty wingman.

❝
F-84e 010 - Intercept
You and your wingman take-off for a routine CAP north of the field. Just as you approach Waypoint 1, you get a distress call to aid two Navy Panthers who are under attack from four MiG-15s.
Whilst you are dogfighting the MiGs, two Yak-9s show up and join in the furball.
Depending on how long the fight drags out, you may be aided by two passing Sabre Jets and two F-51 Mustangs sent to back you up from Kimpo.
Once the four MiGs and two Yak-9s have been destroyed, you may complete your waypoint path and land. If you intend to land, note that your last waypoint is 3: "Contact Tower". On reaching this point, you may be advised to call up your ADF (Shift+5), and tune in Kimpo: 93 - this will aid you to get the correct line-up for the runway. The strip runs 143 degrees/323 degrees, and you may land from either end. Once you have successfully landed and set your park brake, you must then press X to end the mission. Alternatively, you may wish to press X repeatedly in order to warp through the waypoints and end the mission without landing.
❞
Some of my favourite gun camera snaps and theatre footage taken by my trusty wingman.
❝
F-84e 011 -Bridge Strike
Your flight of four Thunderjets is tasked with destroying the bridge at Kumch'on, in co-operation with a flight of four F-80 Shooting Stars.
As you take-off, one of your wingmen will call out these friendlies at high six, and on your way to the target, they will fly slightly to your right. Soon after take-off, and just before the bridge, you will spot a convoy of eight enemy troop-trucks heading towards Kimpo. Your flight will target these first, and then reform to hit the bridge. If your flight destroys the trucks in one pass, the F-80s will go straight for the bridge. Only the central spans need be destroyed and these are labelled.
On the opposite side of the bridge is a second moving convoy of eight enemy trucks. Destroy these once the bridge is downed. You may use rockets or bombs.
Once all these targets are destroyed, you'll get the waypoint marker back, and continue on to Waypoint 2, where you'll search and destroy a battalion of eight Tanks on the move.
Continuing on to waypoint 3, you'll then be bounced by four MiGs, who won't have noticed yet that you are being shadowed by the Shooting Stars, and will suddenly find themselves vastly outnumbered. Your major problem here, is that of mid-air collision.
Once the MiGs are destroyed you may complete your waypoint path and land. If you intend to land, note that your last waypoint is 4: "Contact Tower". On reaching this point, you may be advised to call up your ADF (Shift+5), and tune in Kimpo: 93 - this will aid you to get the correct line-up for the runway. The strip runs 143 degrees/323 degrees, and you may land from either end. Once you have successfully landed and set your park brake, you must then press X to end the mission. Alternatively, you may wish to press X repeatedly in order to warp through the waypoints and end the mission without landing. "
❞
Some of my favourite gun camera snaps and theatre footage taken by my trusty wingman.
❝
F-84e 012 - Evacuation
The enemy forces have broken through our lines and are threatening to overrun Kimpo, so a major evacuation is underway.
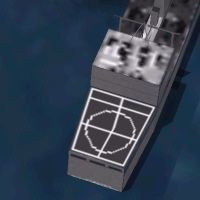
You and your wingman are to transfer south to Suwon, but have been given a route which overflies the Aircraft Carrier Valley Forge in order to escort two damaged Navy F9 Panthers that were forced to divert to Kimpo through low fuel a couple of days ago.
As you start your take-off roll, you'll see six Sabre jets overhead, begining their long journey back to Itazuke in Japan, and a whole bunch of trucks travelling in convoy along the edge of the runway on their way out. You'll also notice the field is pretty devoid of parked aircraft, since you are the last flight to leave.
As you head slightly north, you'll pass a flight of four Mustangs on their way south to Suwon, and soon you'll reach waypoint one, where you turn east to cross the sea at an altitude of around 10,000'.
For a while it's pretty quiet, and then suddenly you spot five MiG-15s crossing your path way below. You must engage these aircraft and destroy them. Depending on how long the fight lasts, you may receive some support from a couple of Navy Banshees setting up a CAP north of the fleet
Having destroyed the MiGs, you reach waypoint 2 and turn south towards the Forge.
Your first indication that you are in the vicinity of the fleet will be sight of the rescue Helo, which circles around during Carrier ops, and then the destroyers, and finally the Valley Forge below you at waypoint 3.
Your final waypoint 4, is just south of the fleet, where you get the "Mission accomplished" text, and the following message which flashes off screen rather too quickly: "The Commies may have the upper hand for now - but you'll be back!"
Hopefully that will be once you've trained up to fly the F-86e Sabre Jet!
Press X to end the Mission.
❞
Some of my favourite gun camera snaps and theatre footage taken by my trusty wingman.